 |
| Scenes involving large, even dark areas, are particularly prone to noise |
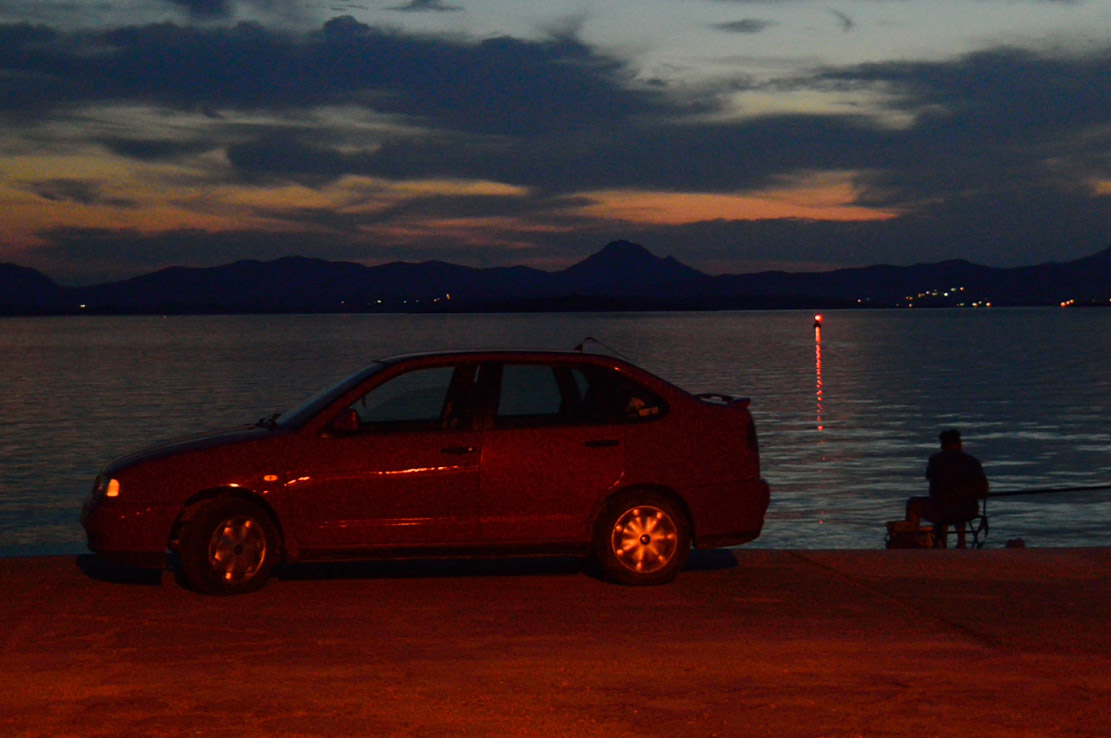
So, without further delay, let's begin. I'll use the following image, taken at high ISO in low light with my Nikon D3200. Nowadays, even entry-level Nikon cameras offer remarkable high ISO performance noise-wise, but that doesn't mean we can't improve things, still.
Step 1:
(Needless to say, work an copy of the image). Go to Image > Mode and select Lab
Step 2:
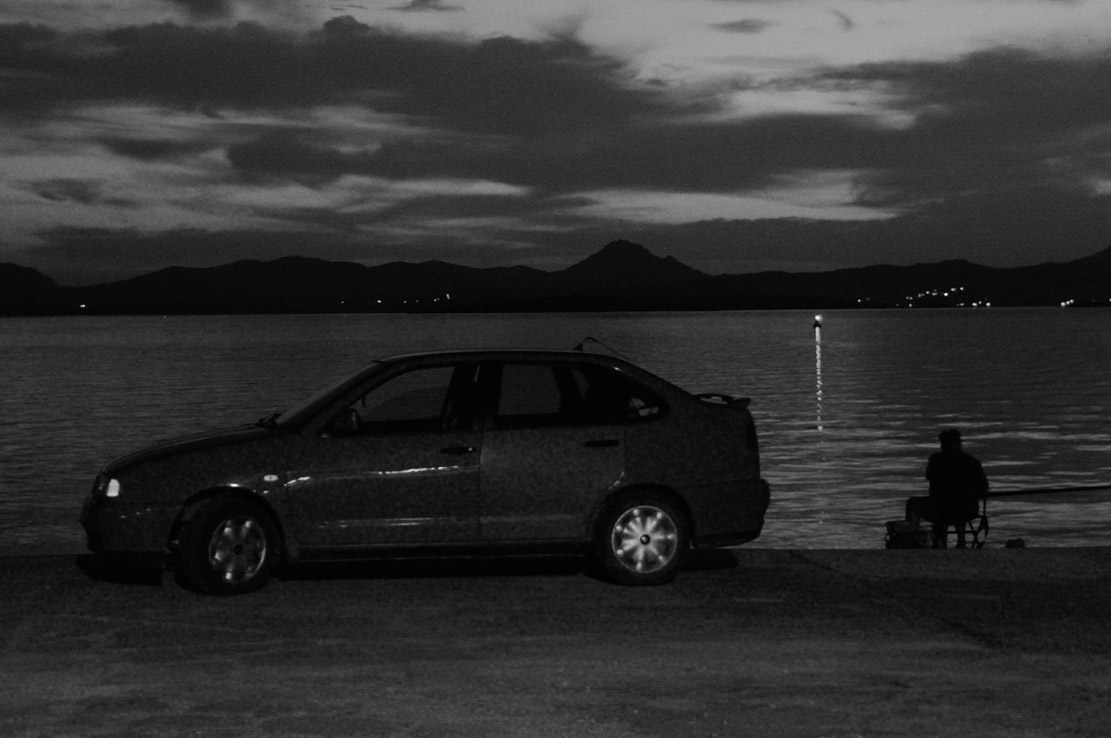
On the "Channels" tab, click on Lightness. Select all (CTRL + A on Windows) and copy. Create a new channel clicking on the little icon below the channel list, and paste the copied content
Step 3:
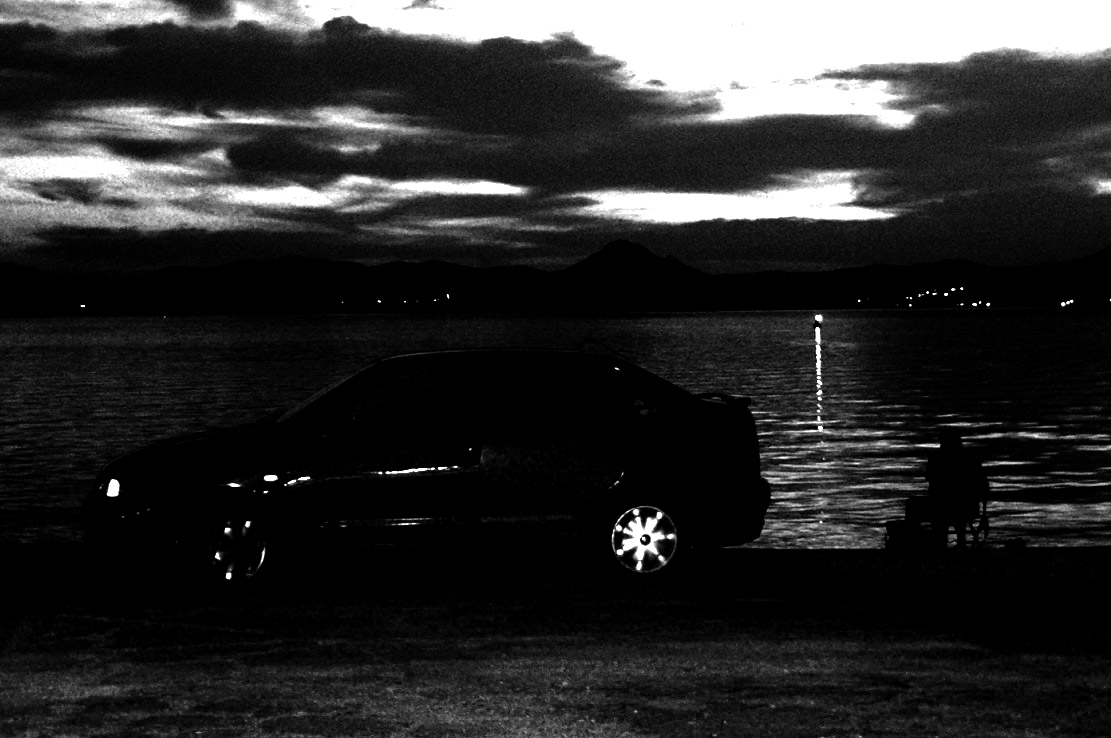
We're working on this new channel we created. From Image > Adjustments, select Levels and increase the contrast to exaggerate the differences between white and black. Here's a before/after example. The exact amount of contrast increase depends on the given image. Experiment.
Step 4:
On the top of the channel list, tap on the "Lab" channel. This will bring back the colors to the image. Now, go back to (click on) the Layers tab. From Select > Load selection, pick the alpha channel you just created. Make sure to tick the "invert" box, so that whatever we do on the following step will have an effect only on the dark areas.
Step 5:
From Image > Mode go back to RGB. Then, duplicate the layer, then click on the Mask icon. This will automatically create a mask based on the selection you provided. Click back on the layer icon (otherwise you'll be working on the mask itself, and we don't want that!)
Step 6:
Time for noise removal. If you don't have any noise plugin that you could use, simply use Photoshop's own noise removal algorithm (it's in Filter > Noise > reduce noise). You will notice that the procedure affects only the shadows. Finalize, if needed, by making adjustments on the mask (for instance applying a Gaussian blur, or making selective enhancements)
Final result:
(click to see the enlarged version)


No comments:
Post a Comment