Tips for Better Manual Focusing
Focusing screen calibration
The most important thing you can do to avoid errors with manual focus is to make sure your focusing screen is calibrated. When the screen is miscalibrated, you will tend to either front-focus or back-focus. That is, when the image in the viewfinder is in perfect focus, the image that falls on the sensor will not be. |
| D800/D810 focusing screen |
My D800 apparently requires a 0.5mm standoff, which is created by stacking two 0.15mm shims and two 0.1mm ones. Other combinations of shims that add up to the same standoff are also possible.
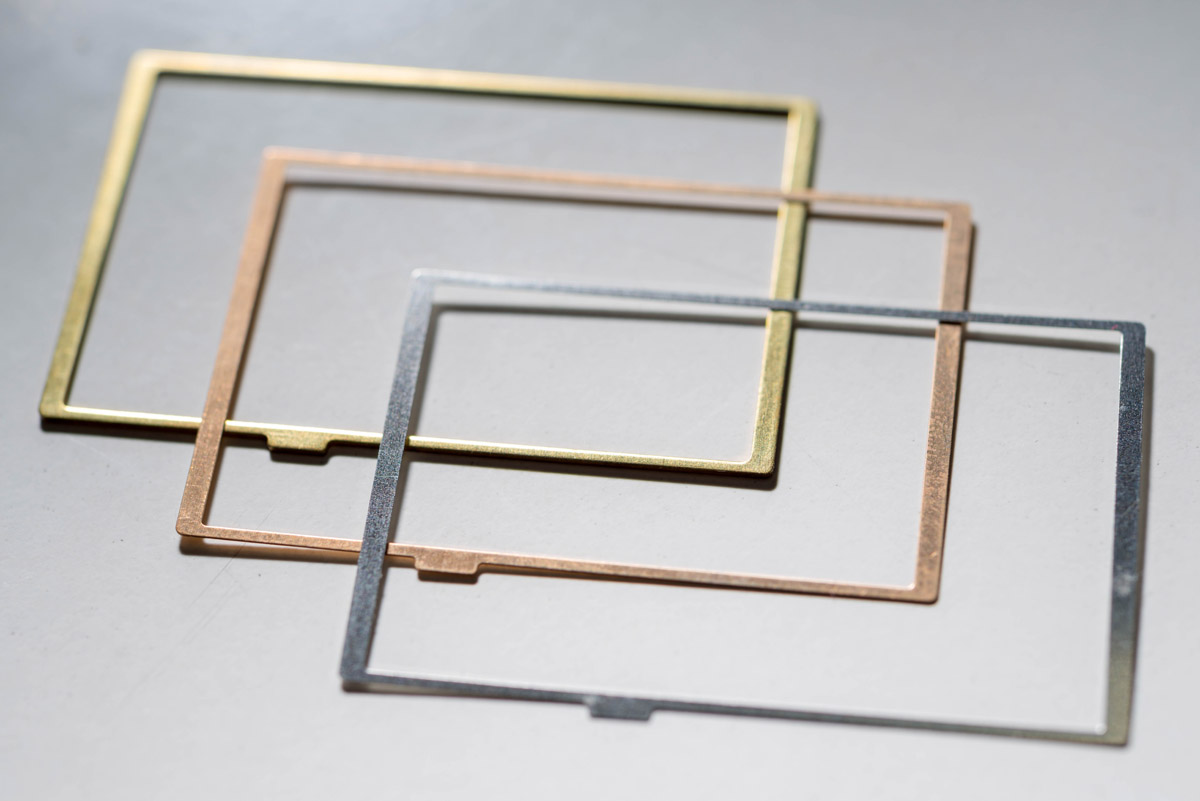 |
| Focusing screen shims |
How can you tell if your focusing screen is miscalibrated? Here's one way. First, use Live View to focus on a nice, high-contrast subject as well as you can. It's actually better to use an autofocus lens for this task, since various factors can make manual focusing in Live View harder than it should be. Once you've finished focusing, make a note of where on the lens's distance scale the focus index is by marking the distance scale at the position of the focus index with sometimes that comes off easily, such as correction tape or perhaps a colored pencil (of the waxy kind that the French call crayons). Now, exit Live View and deliberately defocus the lens by turning the focus ring in either direction. Next, while looking through the viewfinder, manually adjust focus by turning the focus ring to and fro until the viewfinder image is as sharp as you can make it. Finally, look at the distance scale on the lens again and compare the current position of the index mark to where it was when you had focused in Live View. You should repeat this test several times to try and eliminate user error, or else you may conclude falsely that calibration is needed.
If the focus position obtained through the viewfinder is closer than the one obtained in Live View, then the focusing-screen-to-pentaprism standoff distance is too long and needs to be decreased. If it's farther, the standoff distance is too short and needs to be increased.
 |
| D800, Voigtlander Ultron 40mm 2.0 @ f/4 |
Adjusting your focusing screen calibration yourself is not an easy task, mainly because it is next to impossible to obtain the needed shims. Nikon will not sell them to you for any amount of money. Because I wanted to calibrate my D800, I searched the internet for days looking for any source of shims. Finally, I found a comment on a forum at dpreview.com that mentioned a Nikon parts specialist in China who had helped the commenter with something. I forget what it was, but for some reason it made me think this merchant might be able to sell me a shim or two. Fortunately, he did, and he sent me an assortment of D800 focusing shims at a very low price. I do not know if he has any more of them, or any at all for other bodies, but he can be found on eBay by the username "repair-man".
If you can't find any shims for your camera, you may be able to fashion them yourself. I have read accounts of people making them from beer cans, plastic film, or thin cardboard. Whatever the material, you'll need a template, and really the only viable one is one of the existing focusing shims from your camera.
The final difficulty, should you choose to calibrate your focusing screen yourself, is the challenge of extracting the screen without damaging it. These screens are incredibly easy to scratch — and any scratch will be visible, plain as day, in the viewfinder. I know, because I managed to scratch two of them before I got the hang of extracting the screens correctly. The scratches occurred when the improvised tool I was using to release the retaining clip slipped and skidded across the screen. Replacement screens for the D800/D810 are about $30 on eBay, a bit less on AliExpress.
If you can't find any focusing screen shims, or you don't trust your surgical skills, you'd better leave focus calibration to Nikon or an authorized repair professional. But if you can overcome these hurdles, there's nothing like doing it yourself.
Understanding the focus confirmation dot
Nikon DSLRs helpfully feature a focus confirmation indicator in the viewfinder. This green dot lights up when the camera's phase-detection autofocus sensor determines that the area under the selected focus point is, within tolerances, in focus. The better bodies add green arrows on either side of the dot, one of which lights up when the image is not in focus to indicate which direction you need to turn the focus ring in order to bring the image into focus.There are two facts about the focus confirmation dot that experience teaches us. The first is that the range of focus settings at which the dot lights up is rather wider than ideal. You will notice that, when the dot is lit, you can turn the focus ring a little to one side or the other before the dot goes away. The upshot is that the dot is often lit when the image that will form on the sensor is not in the best possible focus. Needless to say, there is no additional symbol that indicates "perfect" focus; there is only the one dot that indicates focus within tolerance.
Secondly, if your PDAF sensor is not in perfect calibration, even the center of the "in-focus" range, as indicated by the dot, may not reflect best focus. What's worse, you can't use AF Fine Tune to calibrate the PDAF system when using a manual-focus lens that lacks a CPU — including all AI and AI-s lenses, unless the lens has been "chipped". When using a chipless lens, not only can you not enter an AF Fine Tune value specifically for the lens, but also, the default Fine Tune value is ignored. (If you're not convinced of this, try setting the default Fine Tune value to +20 and then to -20, and see if the behavior of the focus dot changes between the two values.)
These truths are why having a well-calibrated focusing screen is so important: you can't rely on the confirmation dot alone. The best practice is to use a well-calibrated focusing screen as your primary guide, and then to use the dot for confirmation only. Ideally, both tools should be in agreement. But when they do not agree, if your focusing screen is well calibrated, you can trust what you see on the screen — not the dot.
That said, one unquestionably good time to use the focus confirmation dot without reservation is when there is not enough light to rely on your own visual acumen. Given a fast-enough lens, the PDAF sensor is more sensitive than human eyes. In the dark, even an unreliable focus confirmation is better than none at all.
 |
| D800, Voigtlander Ultron 40mm 2.0 @ f/4 |
Dealing with focus shift
Many, if not most, lenses suffer from some degree of focus shift — the tendency of the plane of best focus to move further away from the camera as you reduce aperture. (I've never seen a lens that had the opposite tendency.)When focus shift is bad enough, a photo taken at, say, f/5.6 may actually be less sharp than another taken at f/2.8, despite the increased depth of field provided by the smaller aperture. (This is assuming you don't move the focus ring between the two photos.)
One way to avoid dealing with focus shift is to focus in Live View, since what you see on the LCD in Live View is imaged through a lens that is stopped down to your set aperture. But focusing this way usually requires a tripod, and in low light, focusing in Live View can be harder than focusing through the viewfinder.
What I do to work around focus shift is this: After making the image in the viewfinder as sharp as I can, I will turn the focus ring very slightly to the left, and then take the picture. (With Nikon lenses, you turn the ring to the left to bring the focal plane closer.) The amount I will turn the ring depends both on what the set aperture is, and on what lens I'm using.
If the set aperture is only one stop down from wide open, I usually won't bother adjusting the focus in this way — unless I'm using a lens that is unusually prone to focus shift, like the Nikkor 50mm f/1.4. If the set aperture is two stops down, I will generally adjust the focus to the "close" end of the in-focus range as indicated by the focus confirmation dot. In other words, I will turn the focus ring to the left until just before the focus confirmation dot starts flickering or goes out.
At even smaller apertures (three or more stops from wide open), generally, depth of field is increased enough to compensate for focus shift — unless, again, the lens is unusually prone to it, in which case I may adjust the focus even closer, until the confirmation dot starts to flicker.
These are general tips. To deal with focus shift as effectively as possible, there is no substitute for intimate familiarity with the focal behavior of each of your lenses.
Handling your focus ring
Achieving perfect focus using your fingers and eyes is not easy. Lens makers sometimes try to make it easier by designing a lens to have a long "focus throw" — the angle through which you have to turn the focus ring to go from infinity to closest focus. Then again, sometimes they shorten the focus throw in the interest of helping photographers achieve rough focus more quickly — as Nikon did when they redesigned many AI lenses to the AI-s spec. And then there are the focus rings on AF lenses: these often have an incredibly short focus throw — forty-five degrees is not unheard-of — making precise manual focusing next to impossible.Even with a lens that has a nice, long focus throw, the difference between a critically sharp photo and one that's just a bit blurry may be a tiny, tiny rotation of the focus ring — even a millimeter or less.
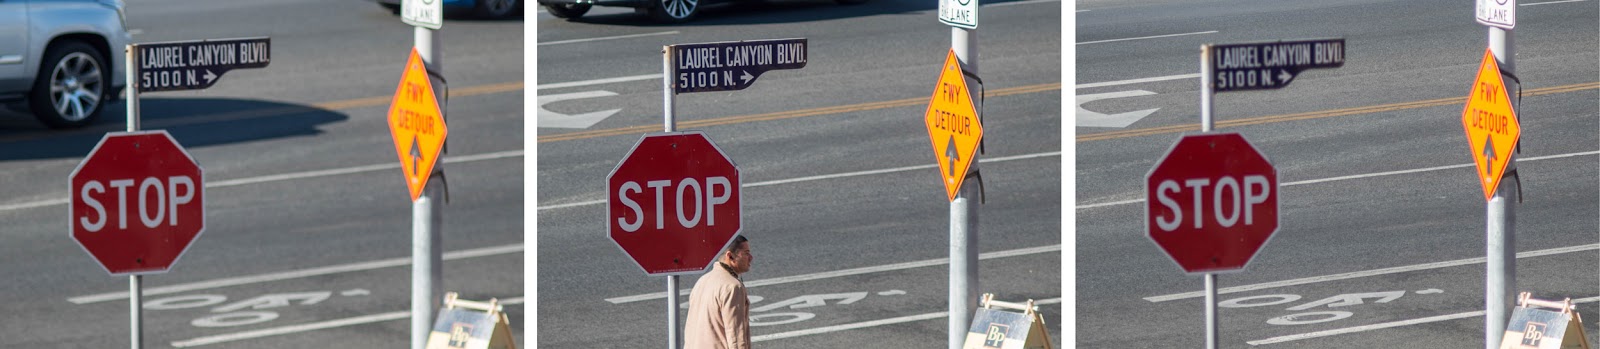
In the trio of photos below, taken through a Nikon 100mm 2.8 Series E lens, the difference between each photo and its neighbor is exactly one millimeter of focus ring rotation. (These are small crops from the original pictures.) The center photo is accurately focused on the street sign. The left photo is front-focused; the right, back-focused. Notice how much the plane of best focus has moved between the shots.
It's not just near the infinity mark that such small movements make a big difference. Here's another set of photos taken with the same lens, with the same 1mm difference in focus ring rotation between neighbors, but this time with a subject that is at nearly the minimum focus distance of the lens:

When you're trying to move the focus ring in such small increments, having a solid, stable stance is critical. If at all possible, brace your left shoulder against a wall or something. Not only does that help you still the tiny, involuntary tremors that hamper precise movements, but it also helps you not to sway back and forth as you try to maintain balance while peering through a viewfinder with one eye.
A technique that can help you find the best focus on any given subject is to "scrub" the focal plane back and forth, repeatedly, through the subject position. First, get your subject roughly in focus. Then, turn the focus ring in both directions, deliberately going past the point of best focus with each turn. Repeat with successively smaller rotations, so that you gradually home in on the optimal focus.
Do you have any manual focusing tips of your own? Share your thoughts and experiences in the comments! And thanks for reading.

No comments:
Post a Comment