A little Photoshop tutorial after some time. Selection techniques (or rather their deployment) is one of the most difficult aspects of photo editing. In an earlier article we'd talked about some of those techniques in connection with selecting hair or foliage, but today I'll show you how to use the path tools of Photoshop to select larger, block-type areas with great precision.
At this point you might wonder why should you not just use the magic wand, the magnetic lasso, or the freehand lasso tool to do the job. The answer is simple: because those tools don't give you the ability to fine-tune the selection the way the path tool does. Even the magnetic lasso tool isn't perfect at finding edges, and that is especially the case if what you're trying to select might be a well-defined object, but not a well-defined image. It's easier to see this with a photographic example.
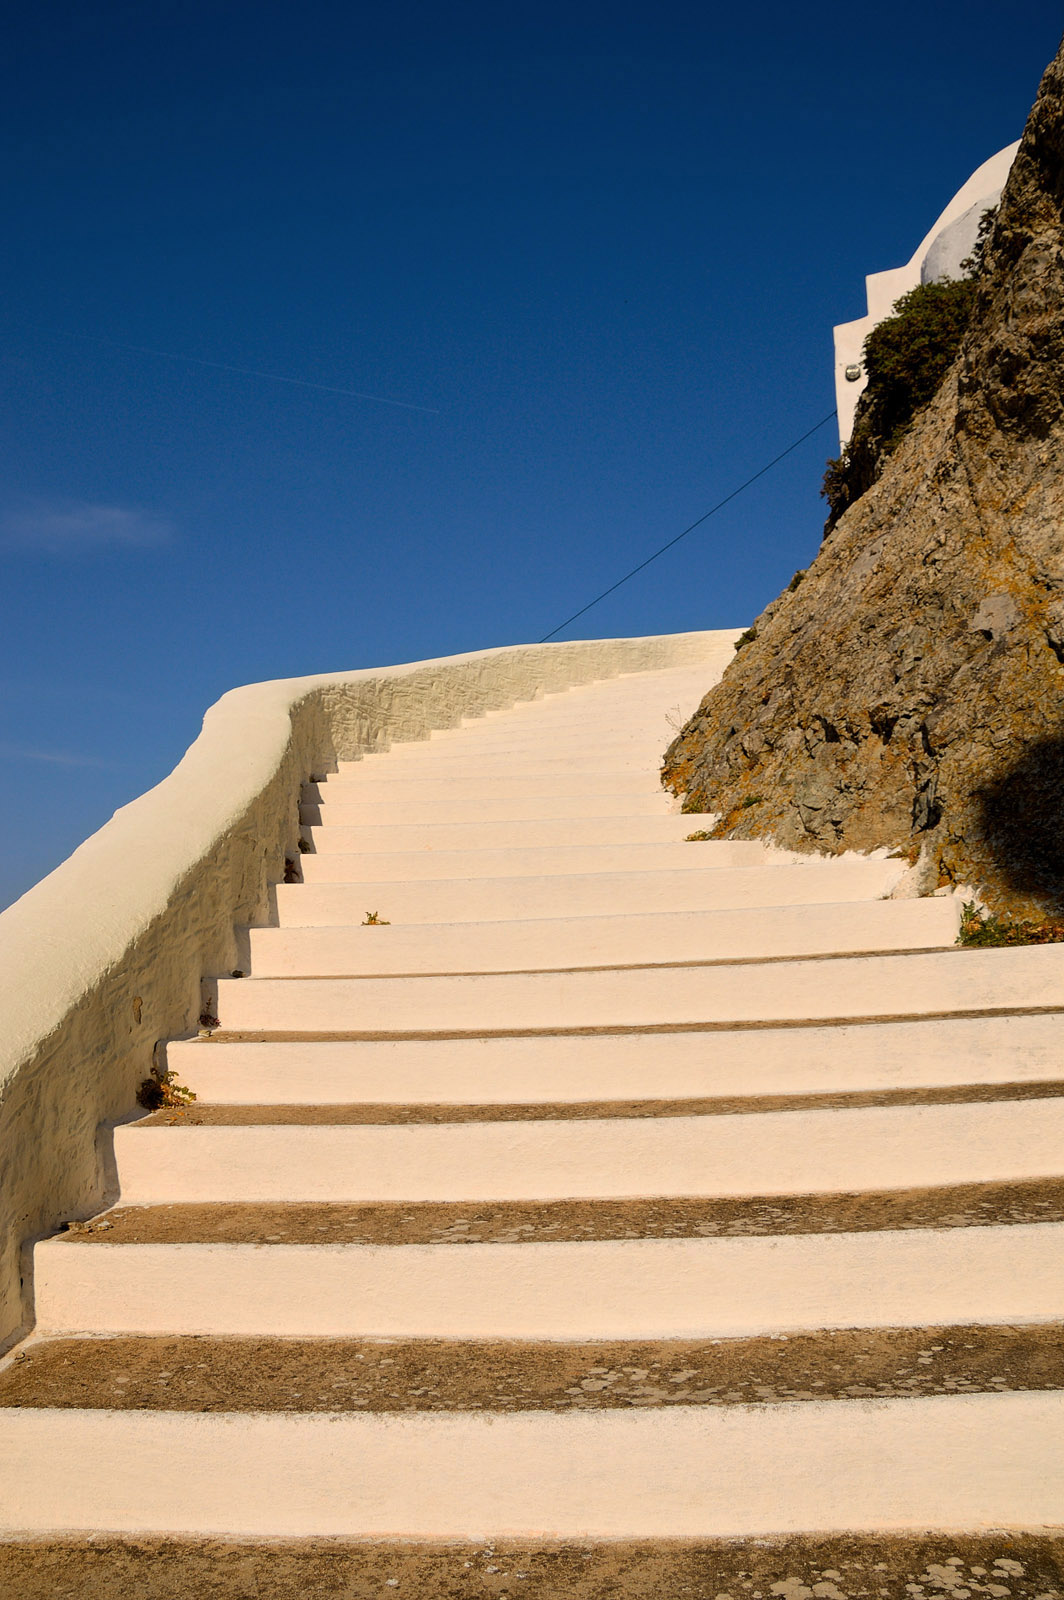
 |
| The side wall is a well-defined object but thanks to the shadow it's not a well-defined image |
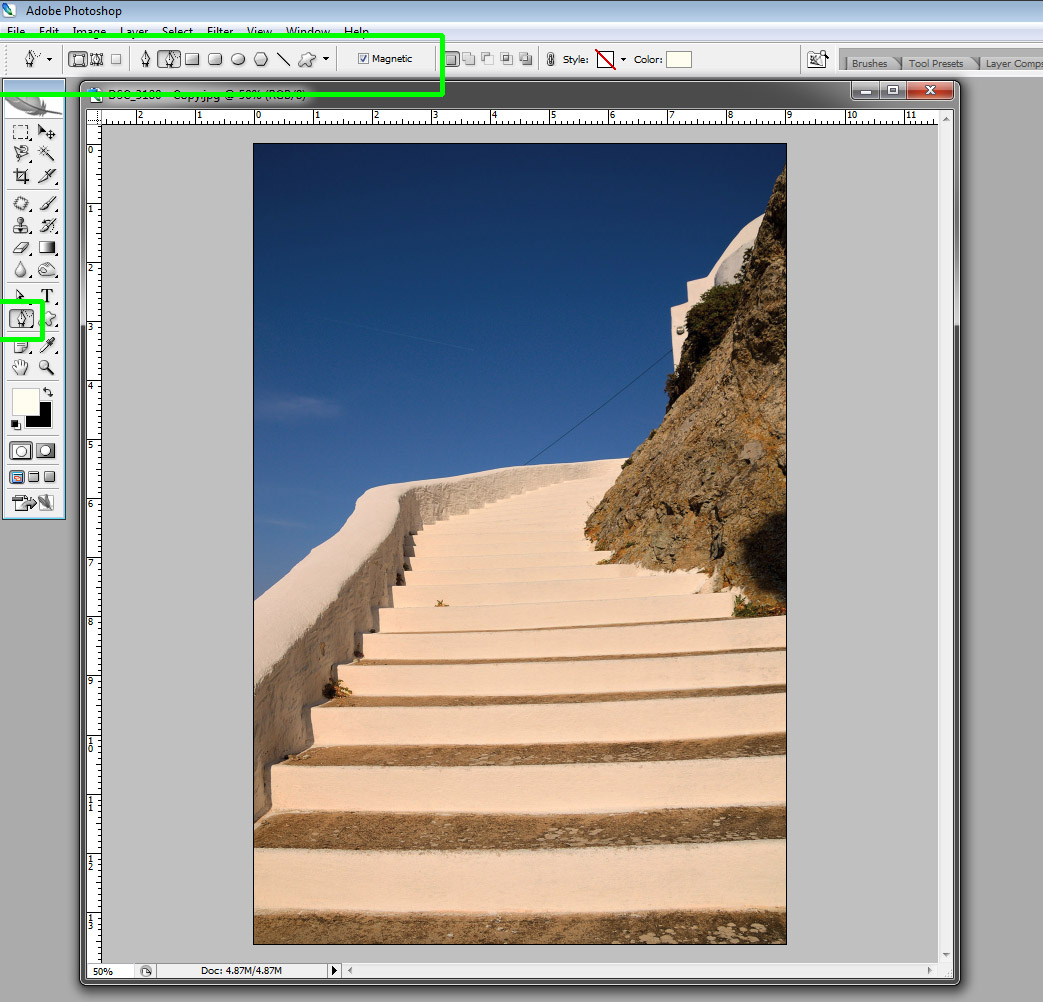
Step 1
Open a copy of your image. Select the freeform path tool, using the shape layers option and ticking the magnetic properties as shown on the image below
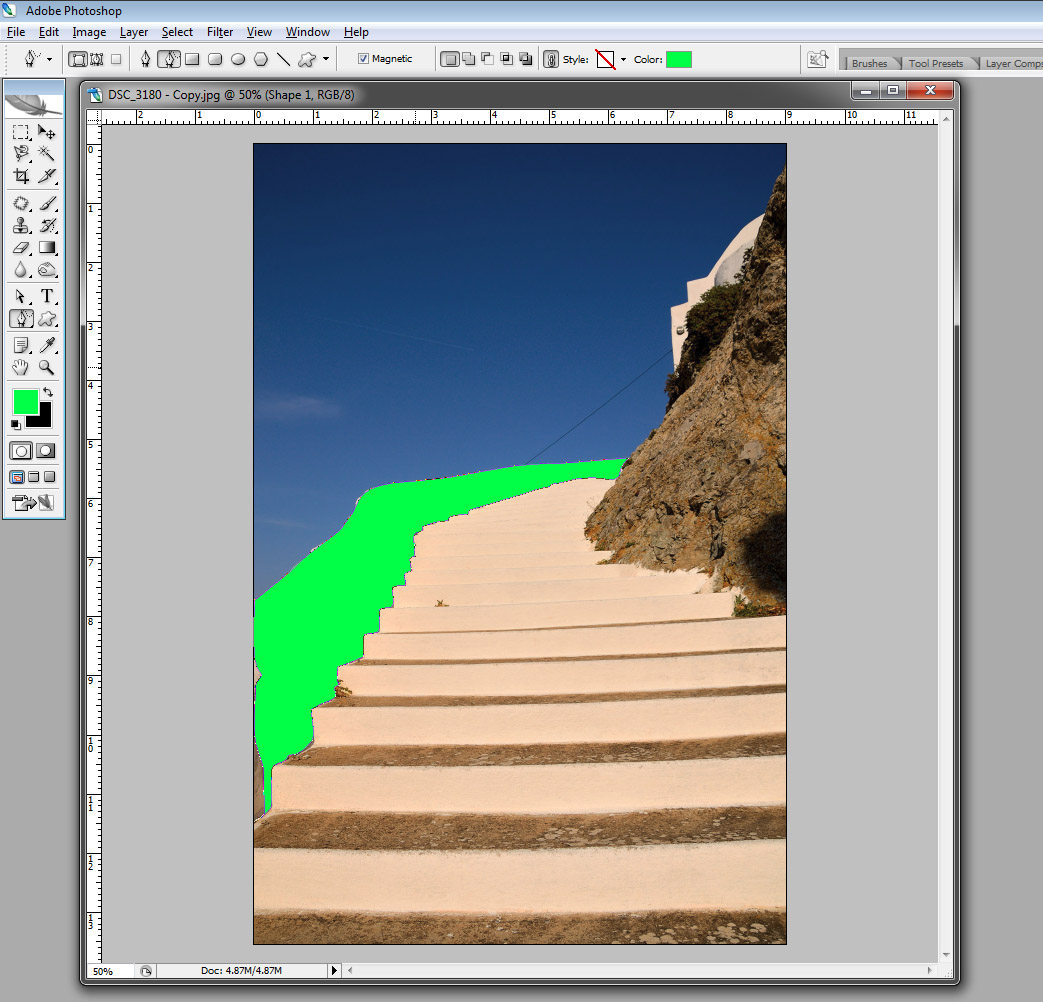
Step 2
Select the area you with to adjust (in our case the side wall). It will be imperfect, for the reasons we mentioned (the magnetic properties of Photoshop are fooled by the shadow). When you have a complete, looped path, it will look like this
Step 3
At this point you will need to add a layer that will contain the adjustment you'll need to perform. For the purposes of this tutorial, I'll add a curves adjustment layer but of course it can be anything you want. After you add the adjustment layer, delete its mask from the Layers tab and then click on the chain icon of the shape layer below it. This will unlink its own mask, which you can then drag and drop onto the adjustment layer above. You can now delete the shape layer (it's only a solid color layer, and as it is obvious we only need the mask/path we created).
Step 4
We now need to adjust the path, so that the selection match our desires. Click on the Paths tab (I think by default it should be next to the Layers tab) and the shape appears on your image (if not, you might have to also click on the mask of the layer of the Layers tab). Pick the direct selection tool. Click onto the line of the path and you'll notice that anchor points appear that you can start "pulling" and adjusting the path in order to make the shape fit. See the image below

Step 5
Adjust the shape of the path so that it fits your requirements. In this example, I'll make sure the selection is on the side wall itself and not on its shadow. It's a good idea to do that at a great magnification. If needed, you can also add anchor points using the path tool. After you're satisfied with the selection, you can perform the adjustment on the adjustment layer. In this case, I decided to slightly adjust the hue by dragging the blue curve a bit downward. Note that you can still make changes to the path, and as you drag the anchor points around you will see the changes "live" - in other words and in this example, we could see the hue changes applied to the areas we select.
Step 6
When you're satisfied with the result, right click on the mask of the adjustment layer and select "rasterize". Now the path disappears. You can still make some final corrections in the familiar way - i.e. working on the mask. In this example I added a slight blur on the mask to make the edges disappear more smoothly. Final result:

No comments:
Post a Comment