There is no shame in that - I don't claim to know everything there is to know about Photoshop - and, furthermore, Photoshop remains a set of tools. Just like you might buy a full box of screwdrivers and pliers and end up using only half of them, Photoshop might contain some features that you haven't discovered because, simply put, you don't miss them.
But could it be so that you would have use for some of them, if you knew they existed? This is what today's article will deal with: discovering hidden Photoshop features. Of course, by "hidden" I don't mean they are locked, invisible, or anything of the sort. Consider them hidden... in plain sight. But either due to their special nature or the inherent difficulty in deploying them, most users are probably unaware of them.
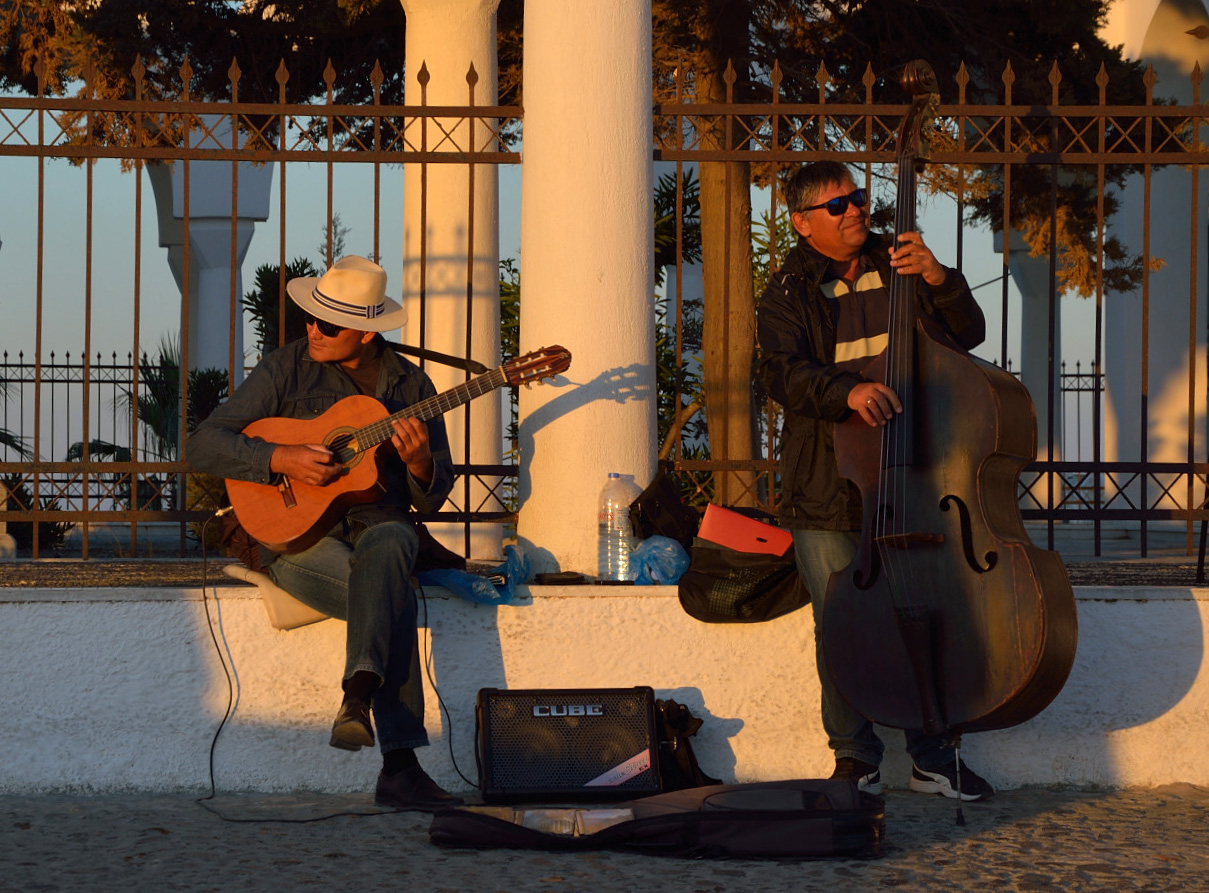 |
| This is the original image on which we'll be doing all our corrections/examples |
Without further delay, let's have a look!
Note: I'm (still) using CS2; some names or menu structures might be slightly different in a newer PS version.
1. Color filter
Most people ignore this, because there are other (and usually better) ways to add a color cast on an image. Still, this is a very useful fast option to have in mind. You can find it in Image> Adjustment> Photo Filter
 |
| I added a 30% warming filter to the image above. Subtle, but pleasant; fast |
2. Apply Image
I have used this in this Photoshop tutorial here. It's a very powerful tool that can give you some unique results. The full scope of its use surpasses this list, but it basically works so that it allows you to combine values from two images or layers (or channel information). Let's see a quick example applied on this picture.
a) I go to the "Channels" tab, then create a copy of the red channel (you can drag & drop the red channel icon onto the "new channel" icon below. I then duplicate my active layer, so that the procedure will not occur on the original, top layer.
b) Image > Apply Image. I used the copy of the red channel as a source (i.e. in the "channel" box) and "subtracting" as blending mode. What this does, basically, is remove everything in the image containing as much as a trace of red. I click OK.
c) I now have an almost black layer on top of my original one. I click "color" as blending mode, and voila, I have an image with all red removed. Because our image has an intense color cast, the only thing left is the slightly blue sky in the background and the musicians blue plastic bags.
 |
| Great procedure if you want to separate color |
3. Calculations
It's very similar to "Apply Image", in that it allows you to combine channel information.
a) I again duplicate the layer.
b) In Image > Calculations, I choose the blue channel as both the 1st and the 2nd source. I choose "color burn" as the blending mode. I click OK
c) I click on the top layer icon to bring back the main view (i.e. with the full-color image). I then go to Select > Load Selection and choose this new channel (its default name is "Alpha channel").
d) I create a new Hue/Saturation adjustment layer
e) In the Hue/Saturation dialog, I tick the "colorize" option. Now I can change the color of the sky to anything I wish.
 |
| Perhaps a deeper blue fits better for the sky? |
4. Stroke
A couple of times someone asked me about an easy way to create a frame effect. There are all kinds of plug-ins, actions, and what not, but Photoshop's own Stroke menu item is the easiest and most flexible. I'm quite amazed people don't realize its power.
a) Always working on a duplicate layer, select the entire image (CTRL+A)
b) Edit > Stroke. I choose "inside" as the placement option. The value used depends on the image size (here I use 35px).
That's it, basically. The simplest option is to use a solid color (black is the most usual option), but also experiment with blending modes. In the example below, I used Overlay
Bonus Option: After you apply the Stroke command, go to Select > Modify > Border, then put the value you require (I choose 70px, to cover the entire frame area), which allows you to further work on the frame. I applied a rippled effect on this example.
 |
| A cheesy example perhaps, but it shows the flexibility and ease-of-use of the Stroke option |
5. Custom Filters
Few know that Photoshop allows you to create, use, and save your own custom filters. Even fewer know how to use them. You can find them in Filter > Other > Custom. In the ensuing dialog popup, the center box represents a pixel, while the rest of them represent the nearby pixels. You can add a number from -999 to +999 in each box, which is the value by which the brightness of the pixel will be multiplied. In order to avoid whiteouts or blackouts, the total sum of values must be equal to 1. Here's an example:
 |
| Slight Sharpness |

No comments:
Post a Comment