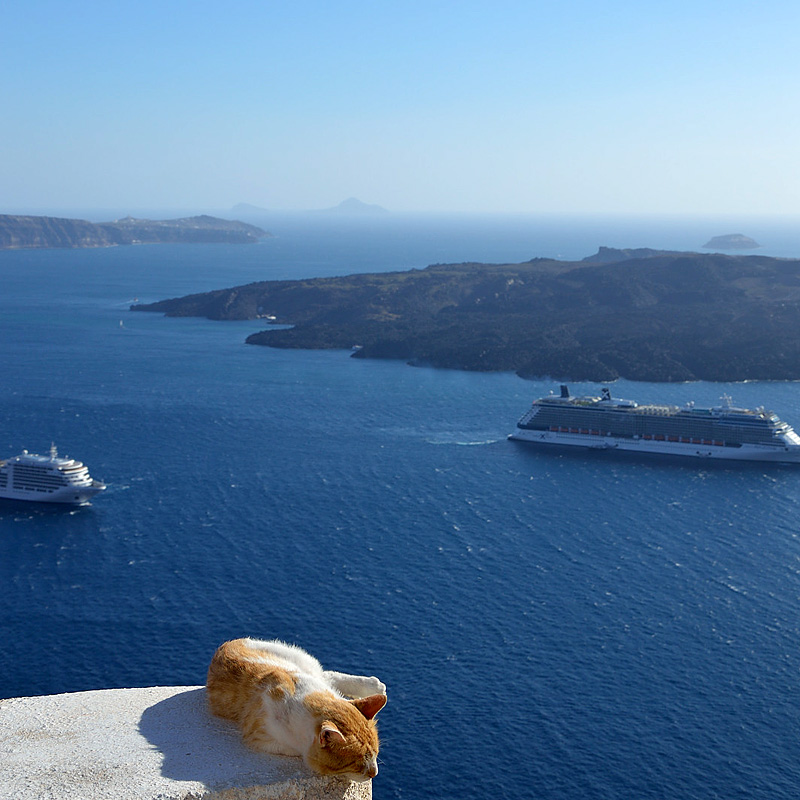
But what is an out-of-bounds image, you might ask at this point. Well, an image is worth a thousand words they say, so an out-of-bounds picture looks like this:

In other words (not a thousand, still!) an out-of-bounds image is an image where the illusion of separation between picture and viewer is distorted. The photo is given a certain kind of three-dimensionality, with the subject purposefully "escaping" the frame.
So, without further delay, let's begin!
There are no set-in-stone rules about the best candidates for such a procedure. Having said that, some images are easier to manipulate than others. I'd advise you to try this on images with a clear, well-defined subject against an easy-to-separate background. It would also help if the subject edge is near the frame. As an example case we'll take the image I showed you above and I'll guide you through the procedure step-by-step, as always.
Note: I'm using Photoshop CS2 on a PC. Shortcuts, menus, and commands might differ on your program or platform.
Step 1
Open your image (rather, a copy of it). Add a new empty layer, then select all (Ctrl+A)
Step 2
We're now creating a white border. From the Edit menu, select the Stroke command, with white color, "inside" as location, and as for width that depends on your individual image. It should be wide enough to reach the subject.
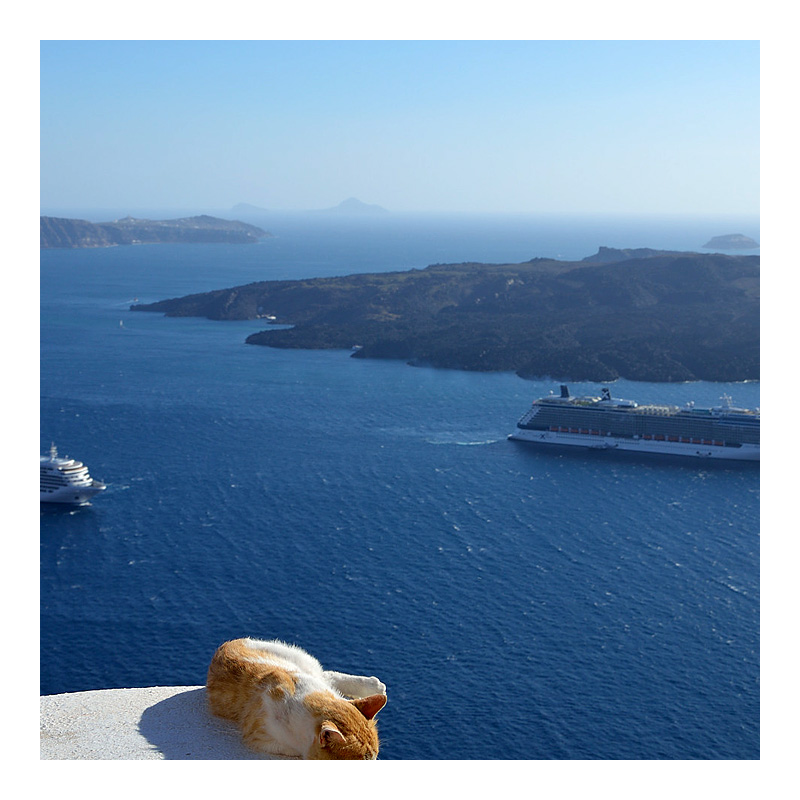
Step 3
Reduce the opacity of the frame layer to about 30%, so that you can see the image layer underneath. Click on the image layer, and using the lasso (or magnetic lasso) tool, select the part of the subject that is covered by the frame (use a small feather range, e.g. 2-3px). Where the subject and the frame unite, select a bit larger area (see the picture below, you'll understand it better)
 |
Step 4
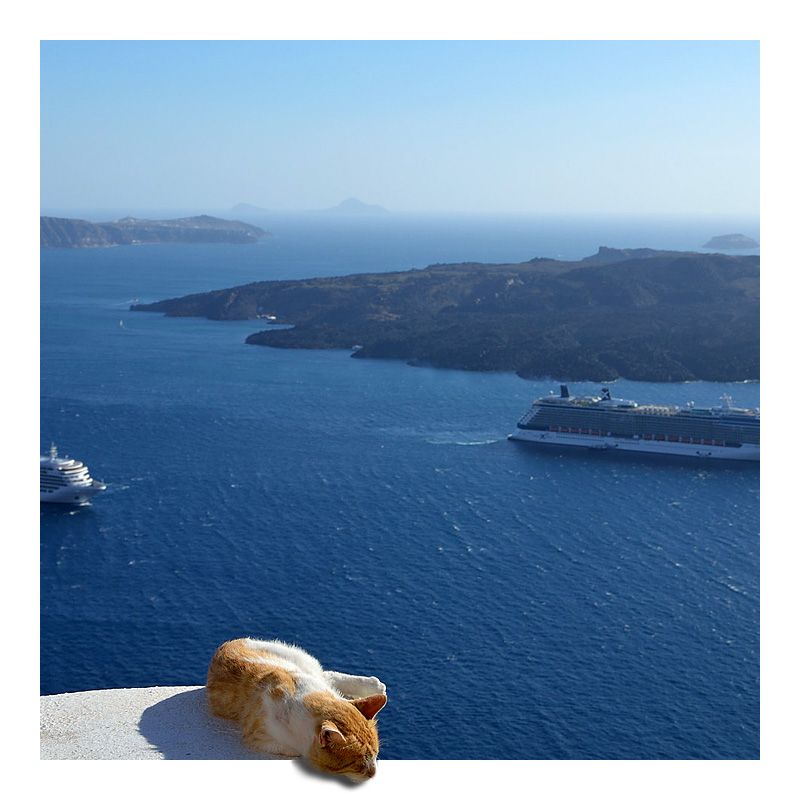
Copy the selected area, then paste it as a new layer on top of the frame layer. It should automatically be exactly over the original, but if not then move it so that it is. Increase the frame layer opacity back to 100%. If you notice any selection inconsistencies or other small problems, use a layer mask on this top layer to erase these irregularities. Alternatively, you can use the eraser tool, though it's less flexible.
Step 5
Right click on this top layer (that is, the layer containing the small area you selected) and pick "Blending Options". From there, select "Drop Shadow" - if there is an existing shadow in the original image (like in this one) adjust the direction of the light so that the real shadow and the artificial one coincide.
Final Result:

No comments:
Post a Comment