Today I will show you how to use Photoshop to improve skin textures on your portraits in two minutes or less. The procedure is something I have come up with myself, and it involves using the "color selection" and "stroke" tools of Photoshop. Without further delay, let's begin.
Step 1.
Open your image. Duplicate the layer. It's always a good idea to work on a layer rather than on the background. Easier to correct mistakes, easier to fine-tune.
Step 2.
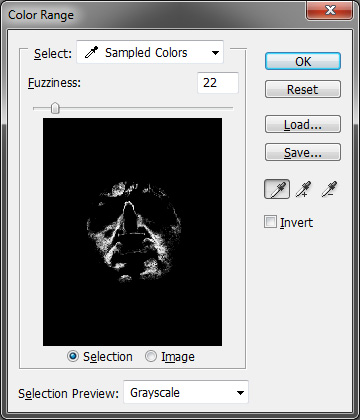
From Select > Color Range, use a low fuzziness number and click on the skin. The idea is to get a very rough selection of the skin and nothing else. It does not need to be accurate, on the contrary. Here's how mine looked after the selection:
Step 3.
From Select > Feather, choose a value of about 10. You can experiment, this really depends on the size of your selection and the image. Err on the side of more, rather than less.
Step 4.
From Edit > Stroke, select a width of 1 pixel, location "outside", blend "luminosity", and hit enter. If you want to experiment, you can also adjust the color from the preselected one (which is the color of the skin you picked on Step 2) to something slightly lighter. Or, if you're fooling around, pick an electric green and change the blending mode to something else ;)
Step 5.
You're all set! The result should be very subtle and natural-looking (remember, less is more). If you think it's too subtle, go back to step 2 and try to select a slightly larger area (e.g. through adjusting fuzziness), or adjust the amount of feathering.
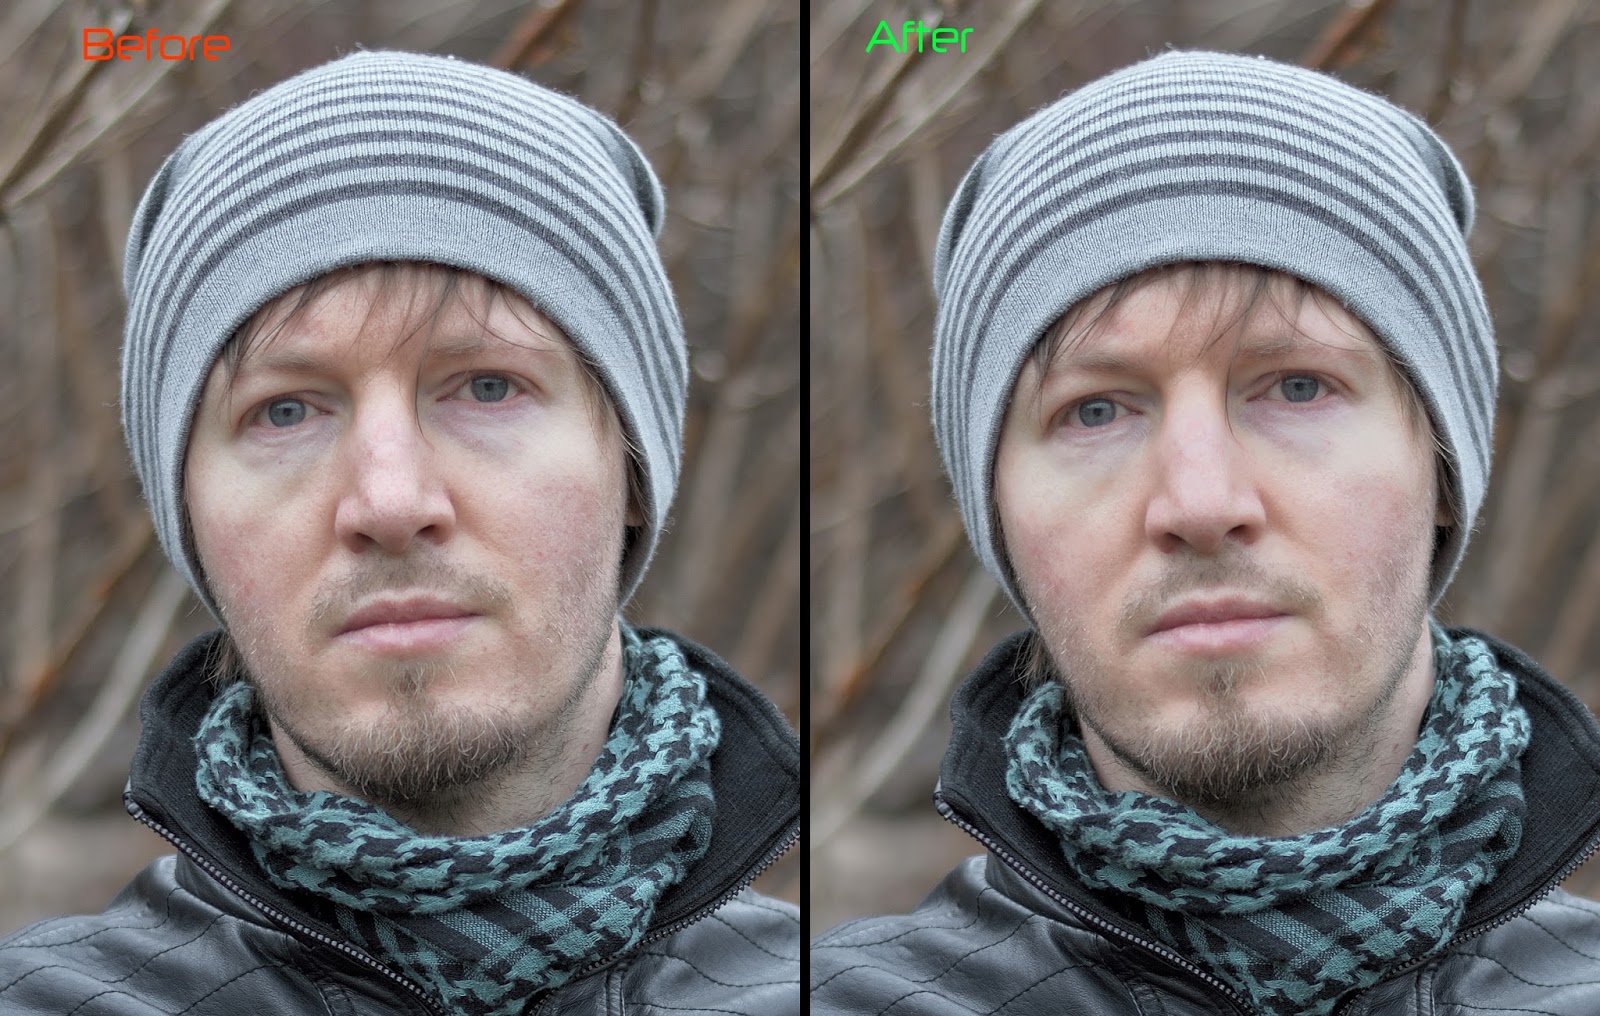
Before/After:

No comments:
Post a Comment