Introduction
Many beginners believe that a flash is something you use when there isn't enough light. It's a remnant of the film days, when you were mostly stuck with ISO 200 or ISO 400 (and a compact camera with a slow lens). Nothing could be further from the truth. Using flash can be a major factor in composition. Your speedlight is your portable light source, and you can use it to your advantage.Today's article focuses on macro photography in particular. Using flash to control the light of your closeups can be crucial for a successful outcome. I will show you with examples how to position your flashes in order to achieve the desired result.
First Things First: What Are you Trying to Achieve?
I always repeat this phrase, and I hope that long-time readers have embraced it. In photography (macro or otherwise) you should always begin from defining your scope: What is it that you're trying to achieve? To demonstrate, allow me to take a step back and point out an interesting fact: When I say the words "Macro Photography" and "Flash", what is the first thing that comes to you? Is it a Ring Flash by any chance? If so, you should pause and try to imagine what kind of image you would get if you used a ring flash. Precisely. You would get an image where your subject would be bathed in light. This might or might not be what you want. If by "Macro Photography" you're referring to photos of products of food, that need to be evenly illuminated and as close to "neutral-looking" as possible, then yes, a ring flash is what you need (there are other options, too, such as a Light Cube).But what if you're after artistic expression instead?
What if you want to learn about positioning and using flashes for macro photography that entails dramatic expression and contrasts, that can offer either tack-sharp images with plenty of detail, or, instead, diffused, soft, ethereal outputs? Congratulations, read on.
 |
| The important of flash position in macro photography is often overlooked. |
Positioning a Flash is (almost) Everything in Macro Photography
I'm exaggerating a bit, I know. If a composition is dull, or if there is some crucial technical error in your setup - for instance, you use a slow shutter speed without tripod - then the position of one or more flashes won't change much. But provided all else is proper, the mere position of the flash in relation to your subject can change the composition and the expressive power dramatically. Let's see this with examples.In the following shots the position of the camera remains the same, and so are the settings. The only thing that changes is the position of a single external speedlight flash. (The photo is a near 1:1 magnification of an orchid branch placed about 1 foot in front of a red curtain). Note also that there is no ambient light at play here; the only illumination provided is from the external flash, so that you can see the results more clearly.
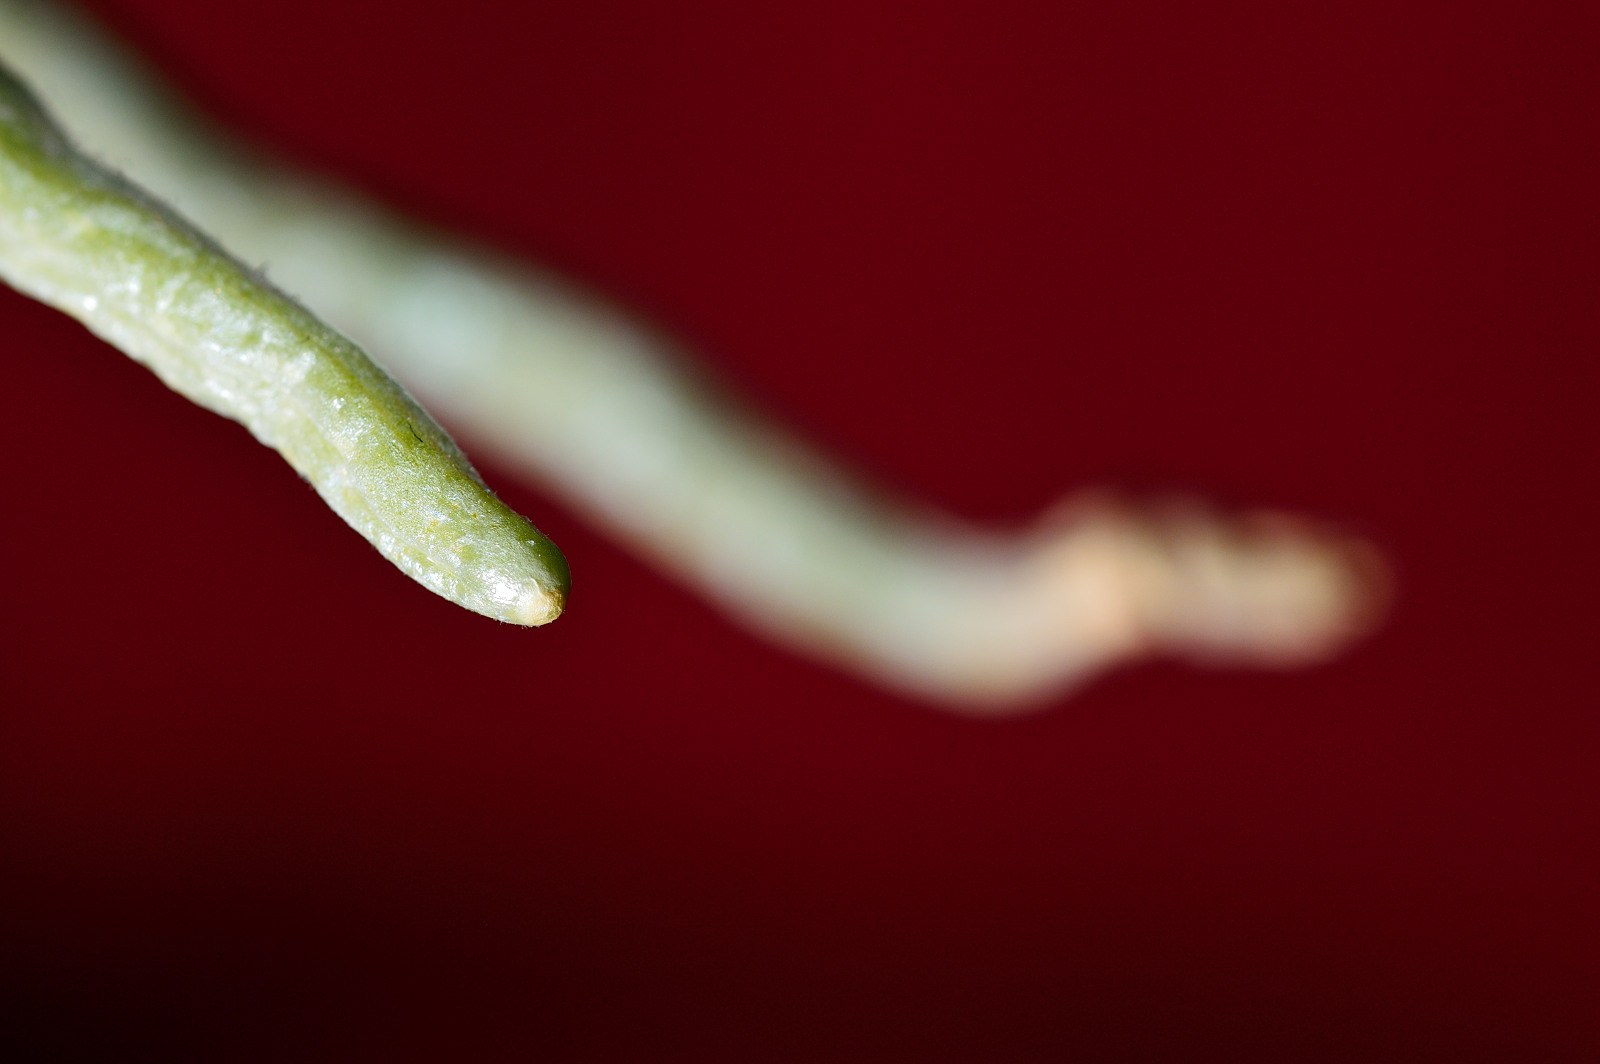 |
| The external flash was placed at a 90-deg angle to the left of the subject, and rather close to it. |
As you can see, we have significant contrast between the subject and the background (that is, the red curtain). This is a result of the speedlight being close to the subject - less power means less ambience, so, in other words, less light reaching the background curtain. Of course, the position of the flash plays a significant part, too: it was placed at a 90-degree angle, so that there was no forward component directed at the curtain.
Let's see what happens if we move the flash a bit further away and above the subject.
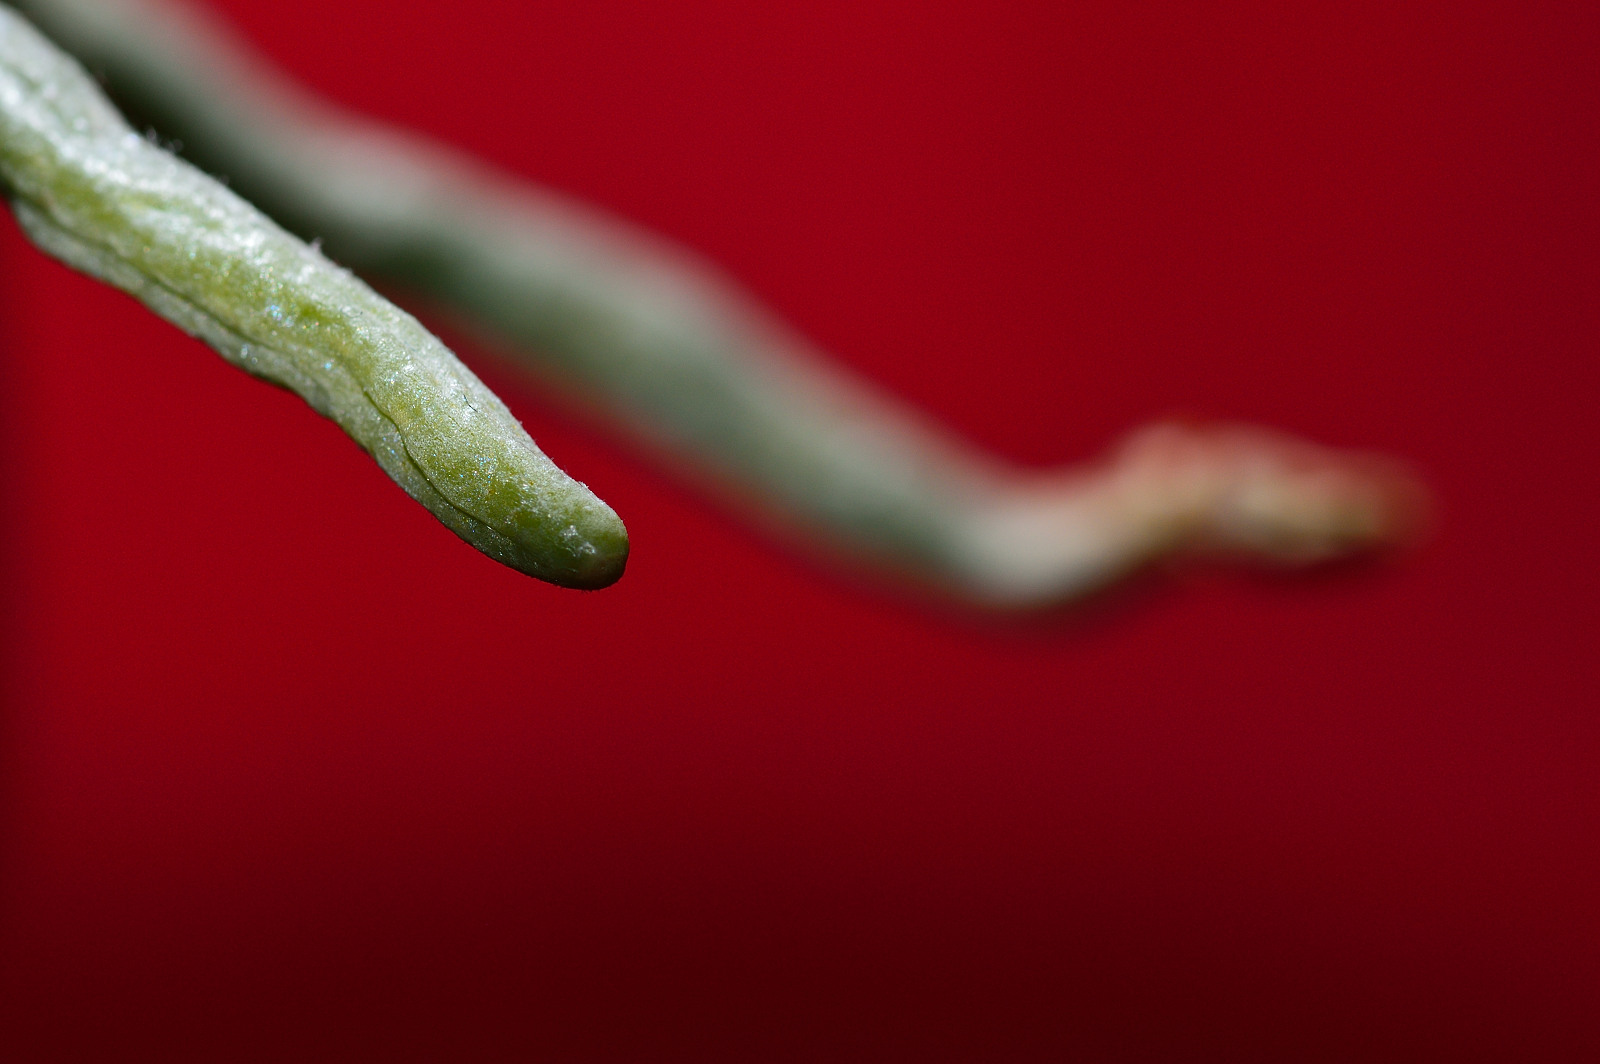 |
| Positioning the flash above and further away from the subject can increase sharpness as well as balance the overall exposure of the scene. |
The result is very different. We now have less contrast between the subject and the background (because we have more ambient light "escaping" from the flash) but the subject is sharper.
Interested in softer, more ethereal outputs? Here's how to achieve such a result - all by simply moving and re-positioning your flash!
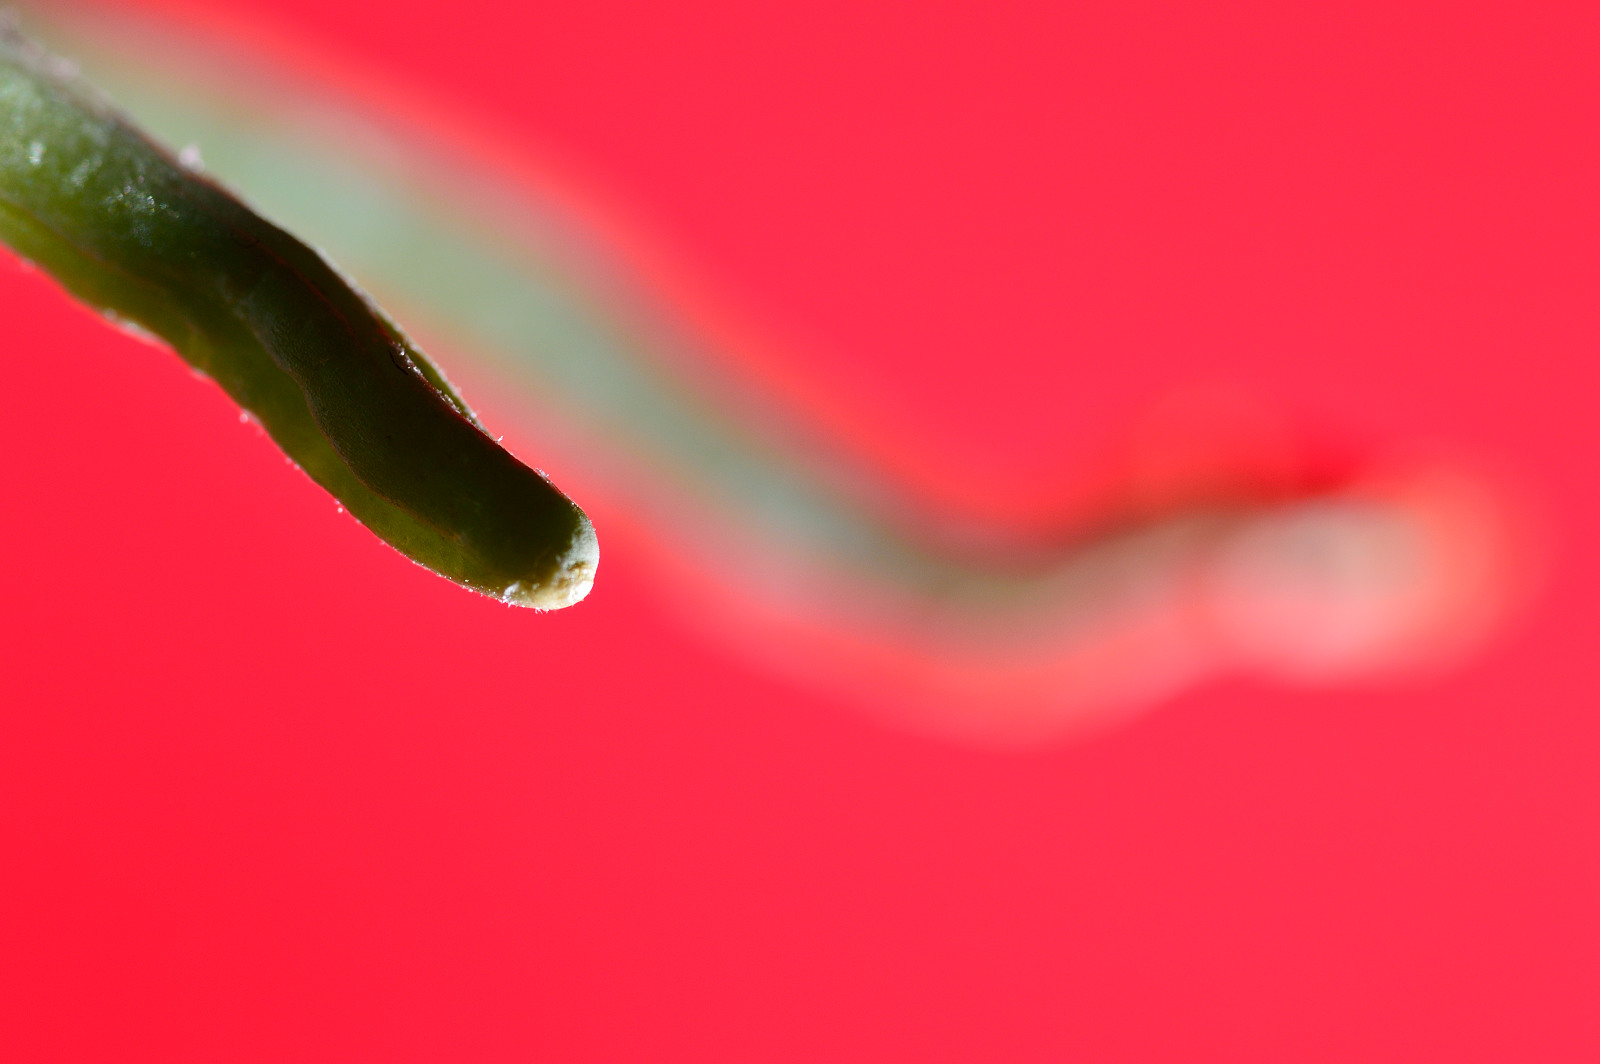 |
| The flash was positioned below and to the right of the branches, with a forward component - responsible for the brighter appearance of the background. |
The contrast here is lowered (let me remind you, I have changed nothing in the settings! It's all about the direction of light) and we have a very soft, creamy result. The reason the red curtain is brighter (and hence the contrast is reduced) is due to the fact that part of the flash output is directed at the background curtain itself.
Variables of Positioning the Flash
Let's summarize, by seeing which things related to flash positioning can alter our result.1) Distance between flash unit and subject: the closer the flash to the subject, the less power will be required, which means there will be less "stray" light illuminating any background. Of course, this also depends on several other factors, such as the distance between background and subject, background reflectivity, etc.
2) Flash below, above, or on the same level as the subject: this is self-obvious: if you position the flash below the subject, the top of the latter will be darkened; the opposite will happen if you position the flash above the subject. If the flash is on the same level as the subject, the evenness of the illumination will also depend on the following:
3) Flash Angle related to the subject (and the camera): the two extremes are 0 degrees (which is basically what you have when you use the flash mounted on the camera) and 180 degrees (the flash exactly behind the subject and against the camera). The intermediate position worth mentioning is the 90-degree angle, which is when the flash is positioned exactly at the right/left of the subject - see the 1st photo example above. Experimenting with these angles (and with everything in between) will produce very different outputs.

No comments:
Post a Comment