For today, I have a special treat for you. A collection of some really cool and really short and easy Photoshop tutorials. As you will see, they are designed to show you the immense power of Photoshop layers and blending modes. Each of the mini tutorials following is in three steps or less! I assume you begin with an opened image, flattened and ready to be worked on. So, let's begin!
1) Contrast/Vividness Boost
It can't get any simpler than that. Doing this gives you an immediate boost in contrast and saturation.a) Duplicate the layer
b) Select 'Soft Light' as blending mode.
That's it! You can also do some more tweaking if you want (e.g. use a mask to boost only certain areas).
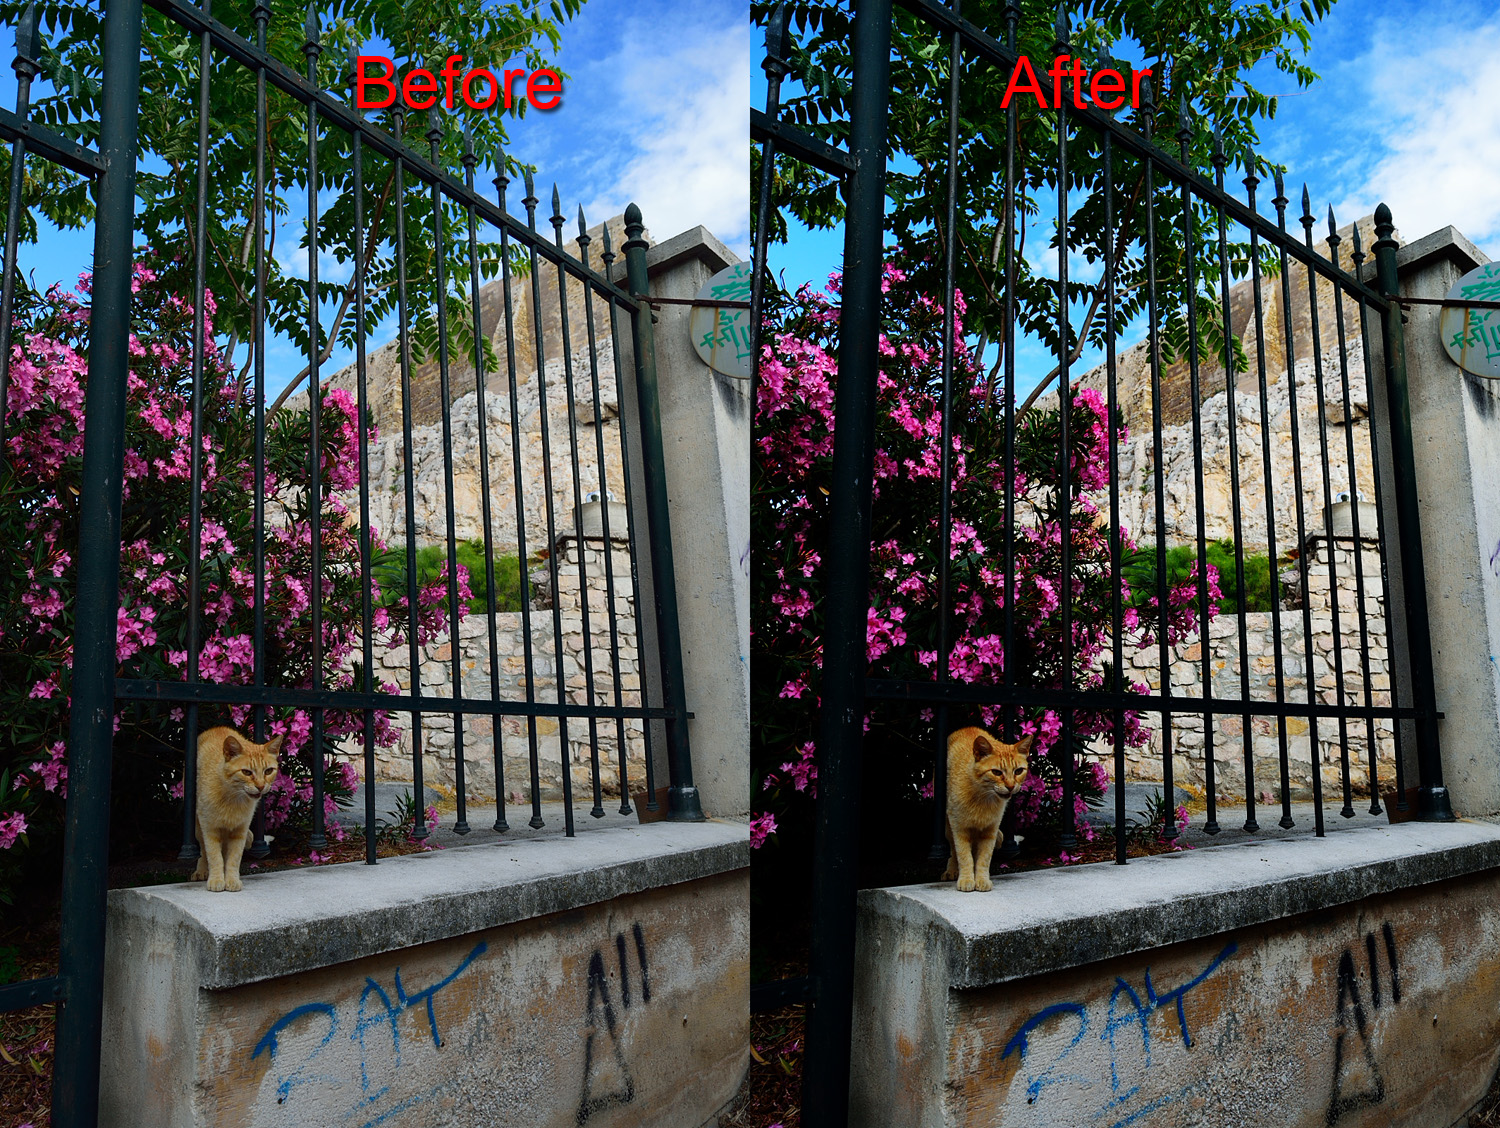 |
| It takes 5 seconds, quite literally. |
2) Simulate IR False Colors
Strictly speaking, this isn't it. But at the same time it's a fast, easy, 2-step procedure that can give you some pretty wild results.
a) Duplicate the layer and set its blending mode to 'Color'
b) Inverse it
 |
| What's up pussycat? |
3) Black & White Filter Control
One of my favorites black & white conversion methods.
a) Create a new Hue/Saturation Adjustment Layer, and set its blending mode to 'Color'
b) Repeat (i.e. create a 2nd Hue/Saturation Adjustment Layer), but leave its blending mode to 'Normal'
c) On this second layer, reduce saturation to -100 (the minimum).
Now, the fun begins when you realize (or... now that you're reading this tutorial), that by moving the Hue slider of the first Hue/Saturation layer, you control the filter effect. In other words, you're simulating a red, yellow, and so on filter. Try it for yourself!
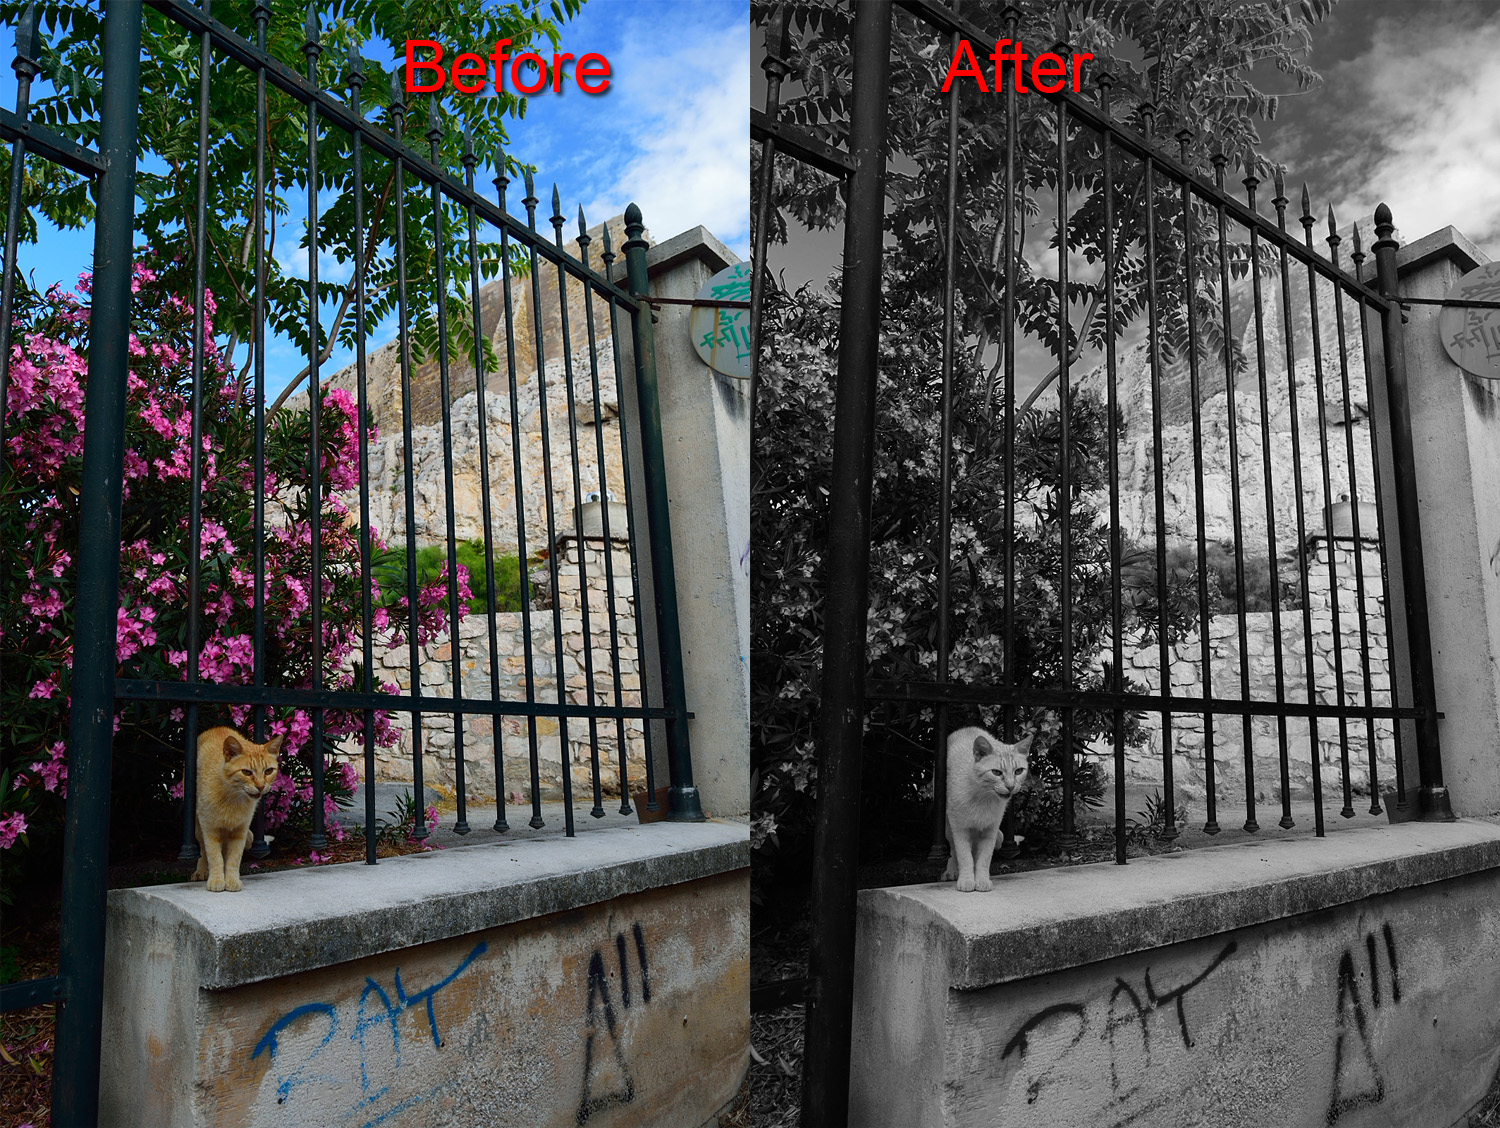 |
| Black and White with a red filter effect. |
4) Unsharp Mask
This I've mentioned before, but I think I should include it here, because it's such a powerful and neat little procedure.a) Duplicate the layer.
b) Apply an unsharp mask filter with the following values on the unsharp mask dialog: Amount 20%, Radius 50, Threshold 0.
c) If required, use Edit>Fade Unsharp Mask according to your needs. You can also use a blending mode (I used 'Darken') to control the output
 |
| The difference is subtle, but less is more in such cases |
5) Soft Glow/ Softening Effect
Last but not least, some softness effects. There is a lot of ways to approach this, I'll show you a couple. It's very easy, and it works very well with portraits (for sake of consistency, I'll still use the same image. There isn't such a thing as too many cat photos, after all, right?)a) duplicate the layer
b) Filter > Blur > Gaussian Blur. You can experiment, but I'll now choose a value of 20 pixels
c1) OK, this is our first option. Simply reduce opacity to 50% and you're done.
c2) Second option. Leave opacity at 100% and select blending mode to 'Overlay' - I'm showing this example below.
 |
| Softening effect for a tough street kitty |
If you're working with portraits and opt for the c2) option, you might wanna consider an extra step. Because color saturation might be high (something we don't generally want with portraits), add a hue/saturation adjustment layer and reduce saturation by a good 50%. Here's the effect of this extra step on the procedure:
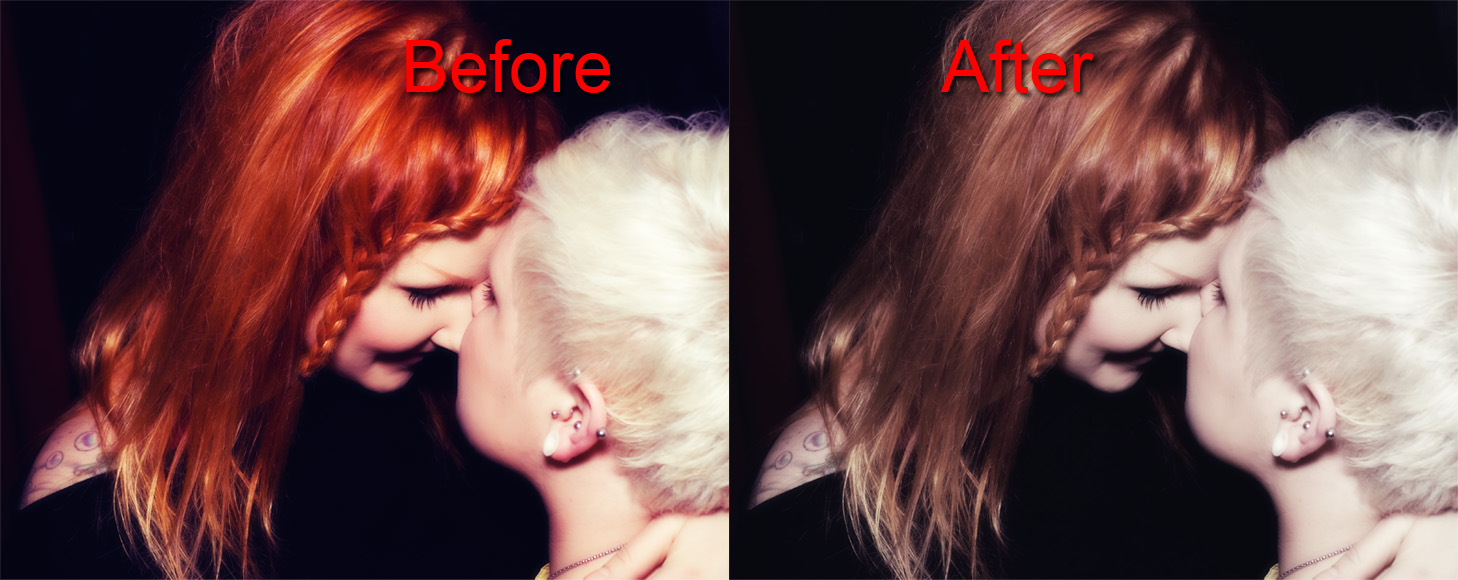 |
| For portraits in particular, reduce saturation for a more pleasing effect |

No comments:
Post a Comment