First of all, two assumptions:
1) by 'monuments' in this context I mostly refer to light-colored monuments - think of the Acropolis, L' Arc de Triomphe, Capitol Hill, ancient theaters, etc.
2) we are talking about direct sunlight photos - as most often is the case in taking photos of monuments.
Try to remember your own past photos of such places, and try to remember what kind of problems you had faced. Let's use a photographic example. Does the following photo seem very similar to the ones you took? Did your own results share a similar ho-hum kind of reaction?
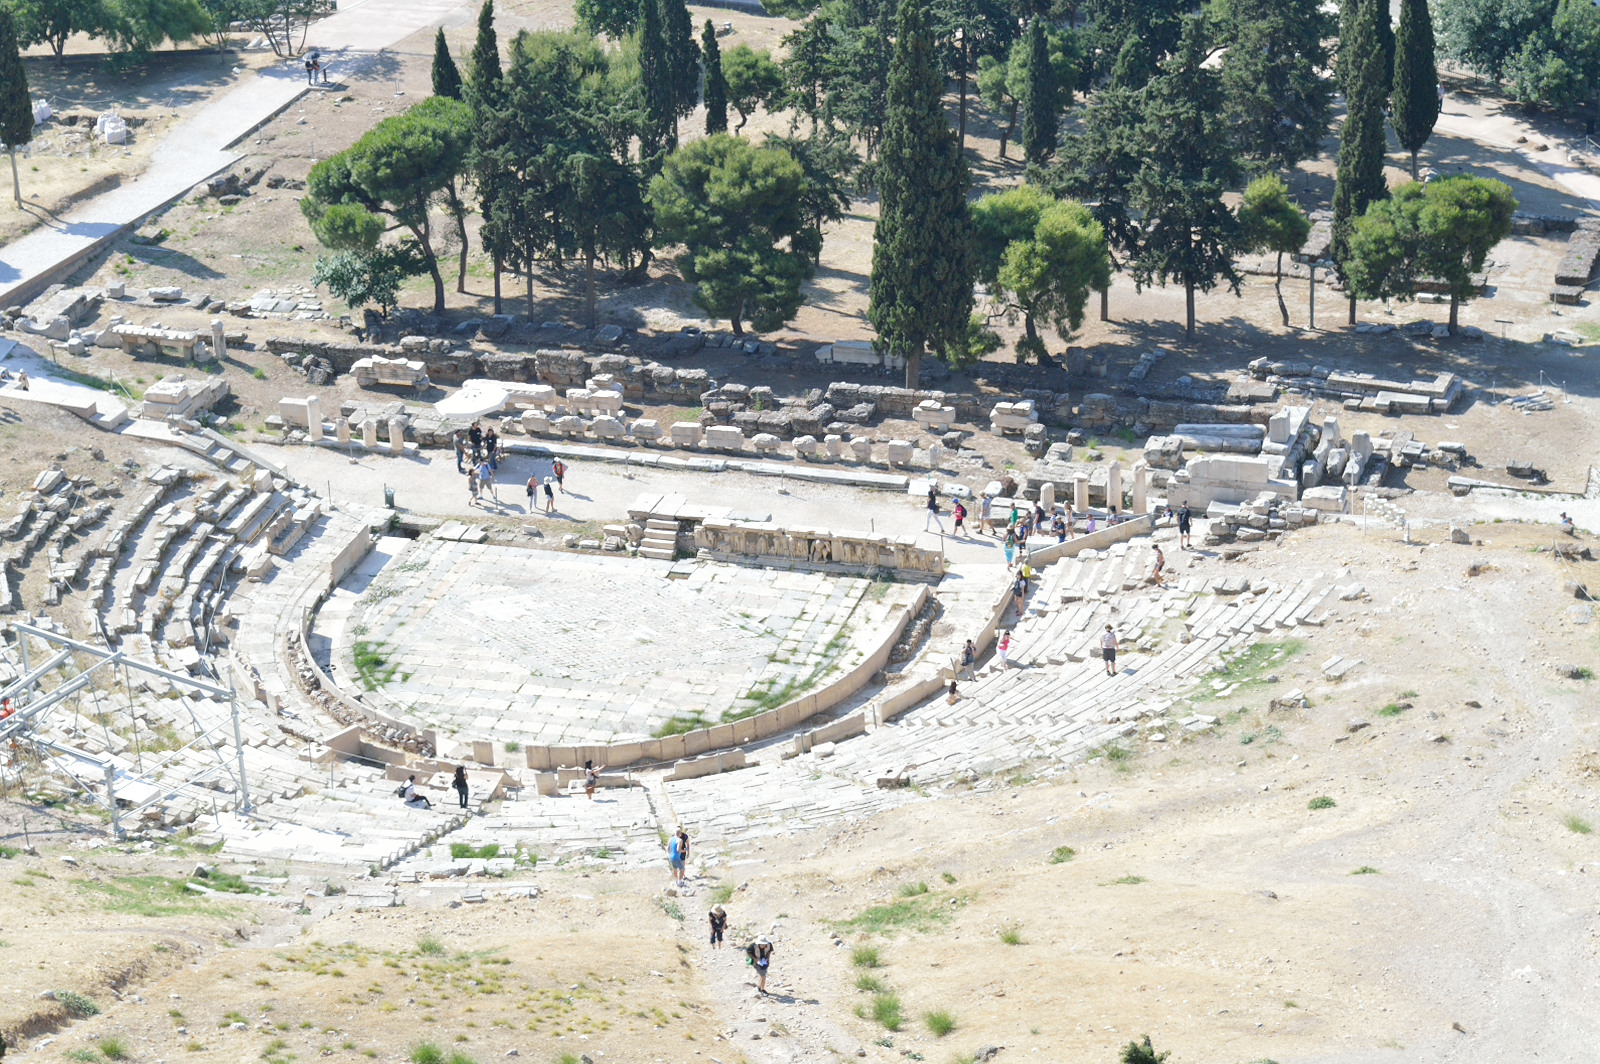 |
| Here's what a typical shot of monuments might look like, if you allow the camera to do everything automatically. |
Some people might say "nice", and not even realize this is substandard. This is because we have become accustomed to photos straight out of the camera looking like that. But take a look at the following version and let me know if you prefer it:
 |
| Here the settings are tweaked according to my own needs. The exposure is lower, which allows the colors to become more saturated and the mid-tone contrast to be enhanced |
So, the main question is: How do you get the exposure right when you photograph monuments? The first thing you must learn to to is this:
1) Learn to "read" the exposure of a sceneAnd by "reading", I don't mean metering with your camera. I mean with your eyes (and experience). You must learn to recognize (based on the technical aspects of your camera; what it can and can't do) whether the dynamic range of a scene is such that exceeds the limits of your sensor. If, for example, you have a bright white marble column bathed in sunlight, and next to it a leafy tree offering plenty of shadow, it is very probable (if not actually certain) that you must choose whether you want to maintain detail on the marble or on whatever is in the shadow (e.g. a person standing).
The second piece of advice, then, is this:
2) Position yourself and what you want to photograph in a way that balances the exposureWhat this means in practical terms is that, for instance, you should avoid shooting against the sun; you should avoid shooting between 12:00 and 16:00; you should avoid framing your shots in a way that include very bright and very dark objects.
After the light is as optimal as possible, then it's time to meter properly. Photographing monuments is easy in terms of metering for this reason: they stay still! Which means, you can adjust the exposure according to your needs, and then shoot away. Basically, if you nail the exposure you need, you can just set the camera to M(anual), and keep going.
So, how do you meter "properly" (=how do you meter monuments in a way that allows the highlights to be preserved)?
3) Take a shot, noticing the exposure elements (aperture, shutter speed, ISO). Examine the histogram. You should have a healthy amount of highlight room (i.e. on the right side of the histogram). In other words, your shot needs to be slightly underexposedWhen the highlights are properly preserved, the colors can also be adjusted more vividly. Take a look at the following examples:
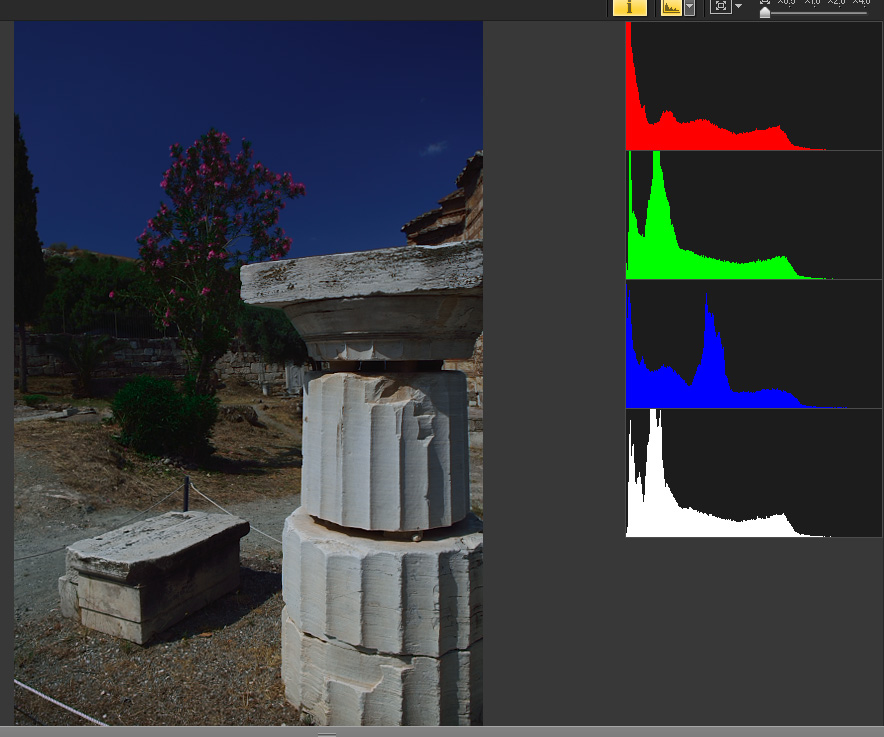 |
| Here's how your histogram should look like. |
You might think this looks too dark. You're right. The difference is that we can adjust this to bring up the shadow detail:
 |
| Look how much better it looks with a simple curve adjustment (I also slightly adjusted the White Balance) |
On the other hand, when you have an overexposed case, the image falls apart:
 |
| Although the overall brightness of the scene is okay, there is severe loss of detail on the column. |
So, to sum up exposure: It's easy. Very easy. Take your time understanding the scene and positioning yourself. Expose making sure sure you have plenty of highlight room in your histograms. If the light is optimal, everything will simply fall magically into place (you might have to adjust a bit in post-production).
If you want optimal photos straight out of camera (that's really not a way to do photography, but let's assume):
1) Choose optimal light.
2) Frame your shot so that the monument is the brightest part of the frame
3) Meter and expose so that there is barely any highlight room on the right side of the histogram.
This is a faster but also less forgiving method. If the highlights are blown on a light-colored monument, it's all over for that photo.

No comments:
Post a Comment