Today I'll show you how to get a cross-processing effect using Curves. First things first: what do we mean by "cross-processing effect"? Basically we mean a Photoshop procedure that replicates the film-era result of processing a C41 (color negative) film in E6 chemicals (meant for slide film) and vice-versa.
Here's how it looks:
You might recognize this look. You might have seen it in a million different plug-ins, add-ons, online filters, and - horror of horrors - apps. You might, quite understandably, ask why you should start using Curves in order to get this result when you can simply use a ready filter. My answer is this:
Curves adjustment is the most powerful Photoshop tool at your disposal when it comes to individual image manipulation.In other words, Curves allows you to fine-tune your image in order to get the best possible result. When using a ready filter, you place your image in the trust of the person who designed the effect. Since the designers cannot adjust their filters according to people's individual images, they only offer extremely crude settings (such as "low", "medium", "high"), if at all. What if your image has a strong highlight area? What if it has a large shadow? What if you want to use less contrast and more color (or vice-versa)? Generally speaking, you can't do any of those with a filter. You can (and much more) with Curves.
Here's a very practical example. The following image shows what happens if you simply load the custom curve file (the one I'll be offering you for free download in a while) without any other adjustment. It looks nice, but the bride's dress is a bit washed out - the design is lost in the blown highlights. This is what would very typically happen if you simply used a ready filter:
But! Since we are using a Curves adjustment layer, that means we can also use a mask and brush out the effect from the lovely wedding dress:
The easiest way to use my cross-processing curves yourself is to download the following .zip file - it contains two curves files (one replicating the C41 film in E6 chemicals and one the E6 film in C41 chemicals)), plus a Read Me .txt file.
X
If you won't/can't download the file (e.g. because you use some program other than Photoshop), here are some screenshots on how the curves look like. Use these values as a starting position, but remember: it all depends on your individual image. Experiment!
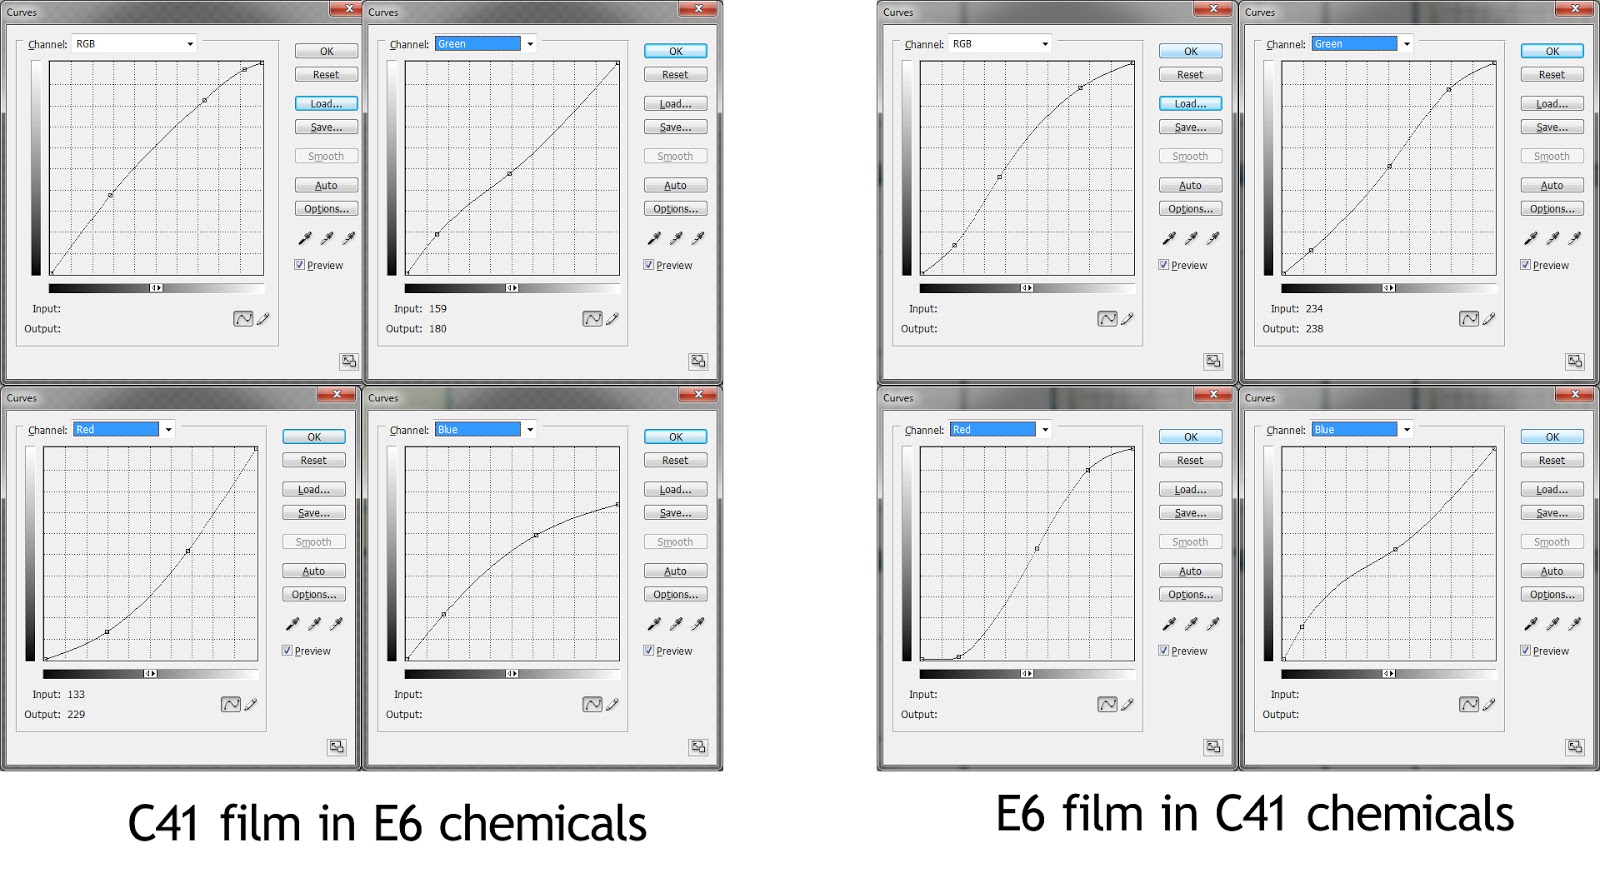 |
| This is pretty much all you need to know (as a starting point at least). Click to enlarge |

No comments:
Post a Comment