Well, unfortunately (or fortunately, if you wanna see the glass half-full), each lens has its very own physical characteristics (mostly related to the aperture blades design) which seal its...bokeh fate before it even reaches your hands. Some lens have superb bokeh, others don't.One of the most infamous examples is the old AF-D Nikkor 50mm f/1.8 (as well as the AF-D 85mm f/1.8). Especially closed-down couple of stops, its bokeh is highly intrusive and distracting. Often to the point that it renders a photo unusable. Of course, the best solution is to use a lens that offers you crazy-good bokeh at all situations. It doesn't even have to be expensive (the Samyang 85mm f/1.4 is what comes to mind). But what if you have a not-so-great bokeh on an existing image?
I've been experimenting with a lot of techniques, looking for the best possible results with the least amount of work. Today's procedure is the outcome. Of course, remember that there are no perfect solutions. We're trying to improve things, not to make them flawless. Some photos and some bokehs are easier to fix than others (hint: it's easier when you have a well-defined, in-focus subject with a clearly out-of-focus background; more difficult when parts of the subject are out-of-focus and/or the background/surroundings are in different stages of out-of-focus).
 |
| It takes as little as 5 minutes, and it can be a life-saver |
So, here it is:
(Instructions assume Photoshop used on Windows; adapt to other programs/operating systems if needed)
1) Open your image, duplicate the layer (CTRL+J)
 |
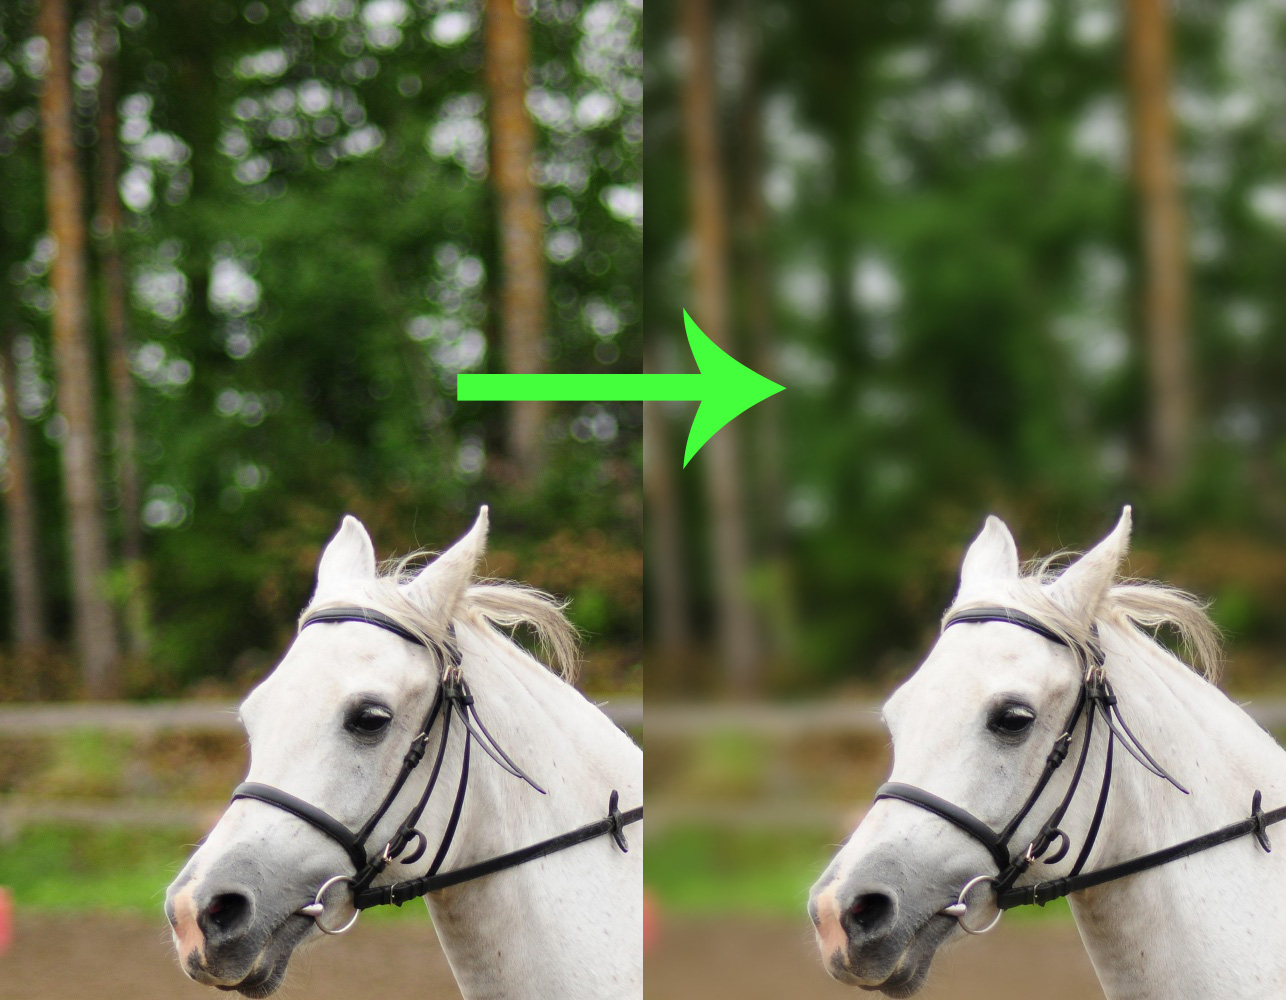
| This is the image we begin with. Notice the highly distracting, bad bokeh |

3) Add a Layer Mask.
4) Reveal Details. Using a soft brush, paint on the mask with black color to reveal the details that should be in-focus (on this specific image, the horse). You will need a combination of sizes and maybe brush softness settings to uncover the area as accurately as possible. Don't worry however, small inconsistencies will be corrected on the next step.
5) Blur the Layer Mask. Select the Layer Mask and apply a Gaussian Blur filter on it. Experiment with the values so that it blends the difference between in-focus and out-of-focus as smoothly as possible.
6) Lower the Opacity of the Layer, if needed (that is, if you need to smoothen the transition even further). A value around 75-80% should be good.
7) Final result:
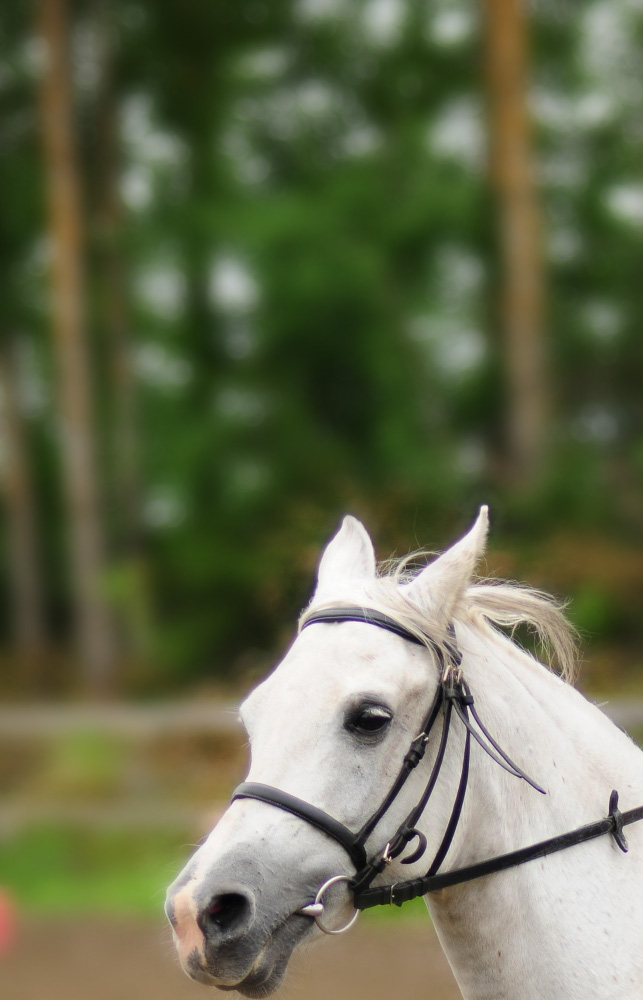 |
| It took about 5 minutes to reach this result. An even better outcome could be produced if you spend bit more time tweaking the fine details. |
Like I said, it's not perfect, but it's way better than before (especially if you tweak the little details with a variety of brush sizes and attributes).
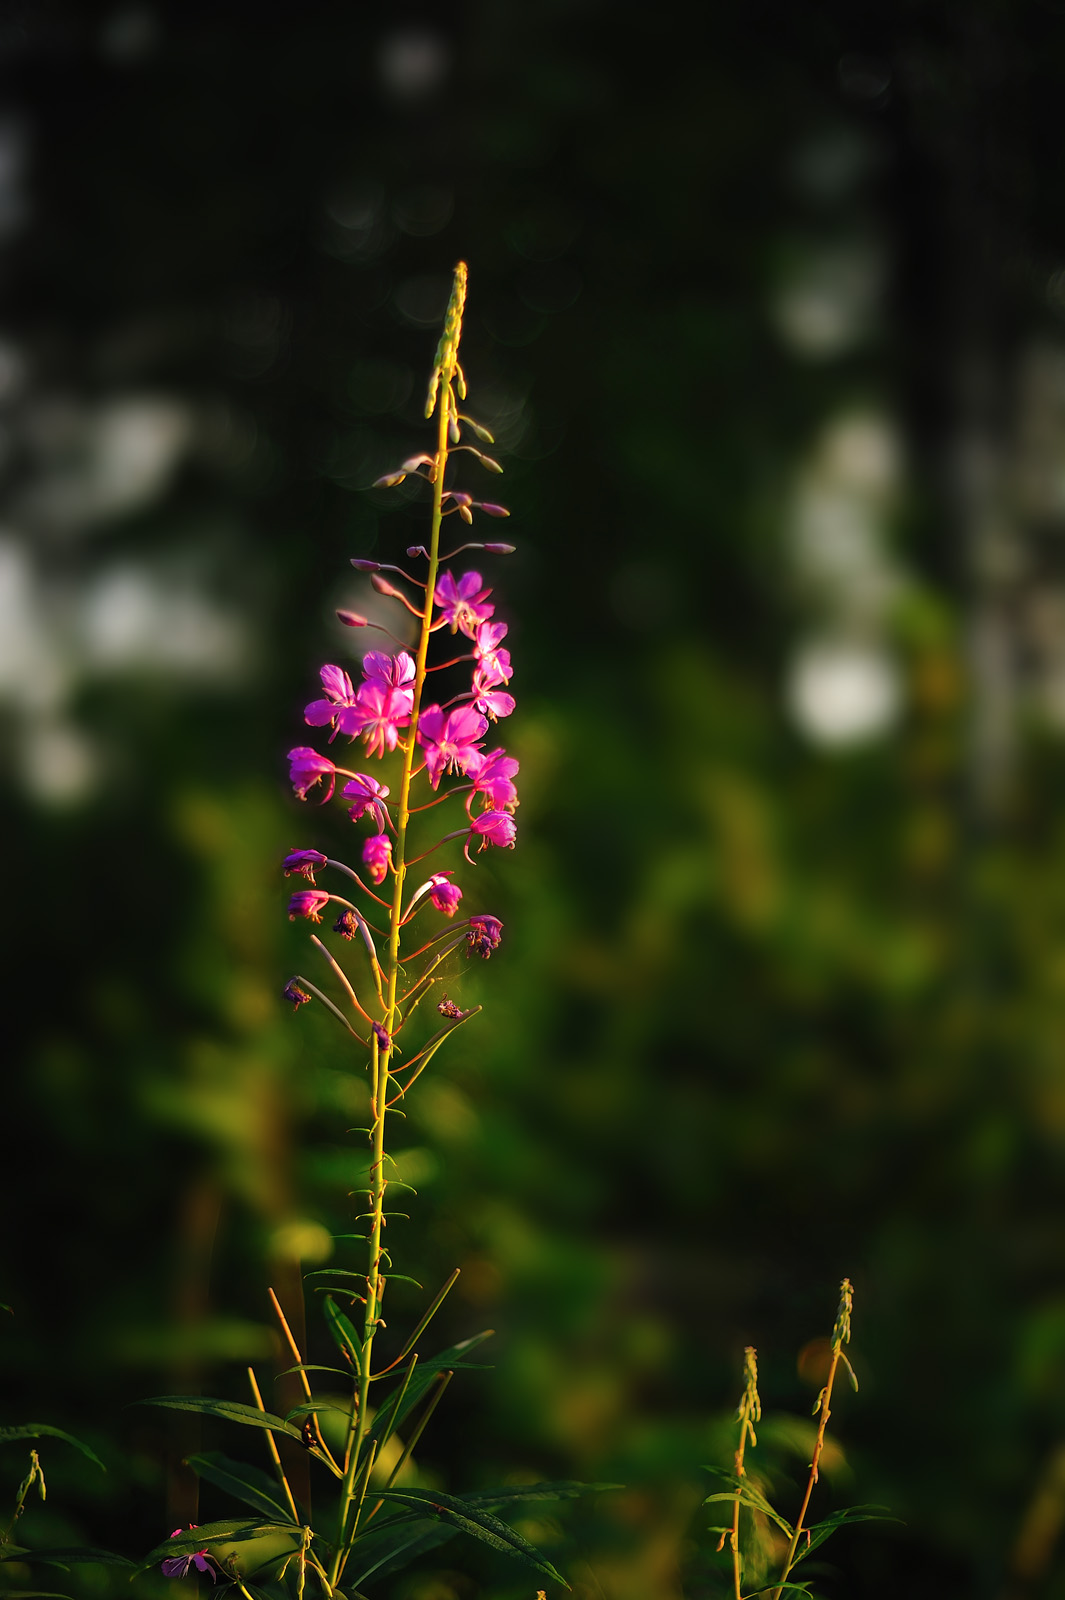
Here's another example. Would you have ever guessed that the original of this had highlights as bad as the original horse image above?
Of course, we have to be realistic. No procedure will ever be as great as using a lens designed for bokeh heaven. It is one thing to rescue a photo taken with a so-so lens, and entirely an other to rely on this procedure on a consistent basis; this, is not a good strategy. Some images are simply beyond salvation (not to mention, your workflow is certainly not optimized, as you're spending time on something that can be avoided with a better lens)

No comments:
Post a Comment