But first things first. What is a successful exposure, and what is accurate metering? These are the questions we need to answer before we go to such questions as "Which metering mode to use for portraits?", or "Which metering mode to use for weddings", and so on. I will try to use basic language so that also beginner photographers can follow, but even if you're an advanced photographer you should read on; this article is for you, too.
An exposure, in beginner-friendly language, is basically how bright or dark a photo turns out. Low exposure (or underexposure) means the photo is dark, while high exposure (or overexposure) means the photo is bright. 'Correct' exposure means the photo is just about right. But already, we need to emphasize something:
Correct exposure is not always an image that is neither too dark or too bright. Correct exposure simply means that the camera gave you the image you intendedIn other words, a scene with completely blown highights (that is, overexposed) but a properly exposed subject, might be what you aimed for. Or, to put in another way, a scene that shows details on the white puffy clouds but keeps everything else darker, might not be what you were going for.
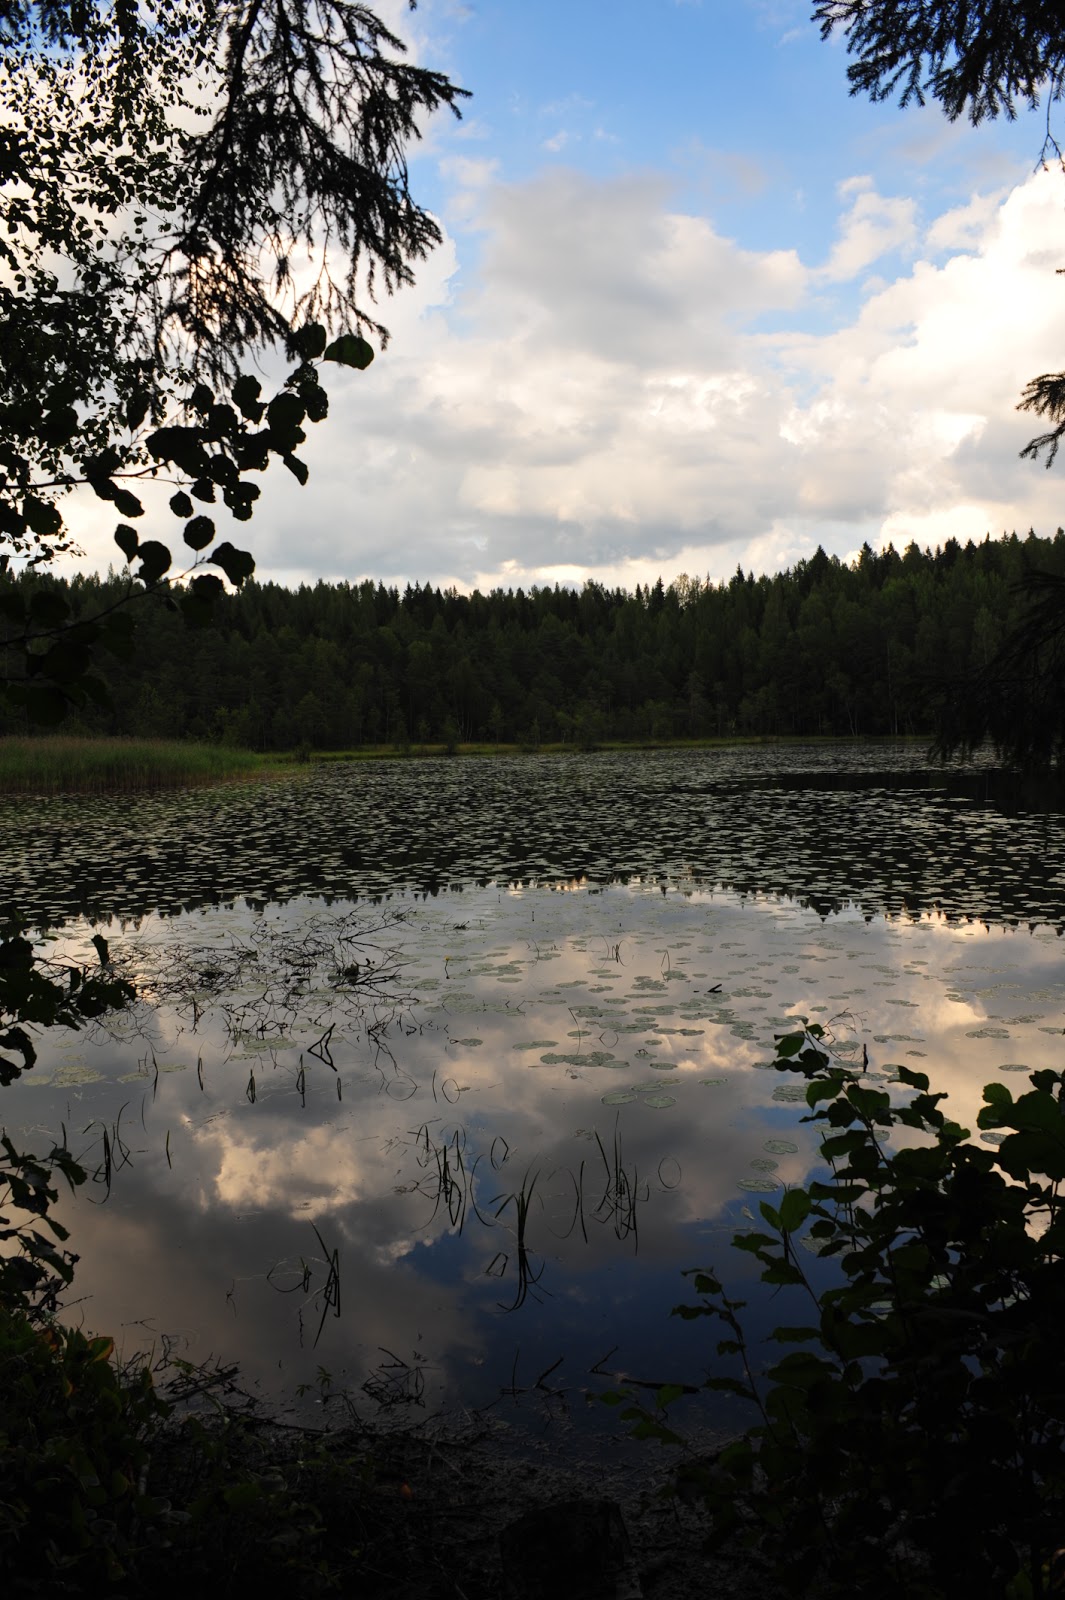 |
| Is this a "correct" exposure because the sky is visible, or an "incorrect" one because the near vegetation isn't? |
Exposure is controlled by:
- Aperture Value
- Shutter Speed
- ISO Value
- Light Level (i.e. how much light there is in the environment)
So, now we are ready to talk about metering.
Metering refers to the evaluation of a scene (i.e. its light level) and the subsequent calculation of exposure. In other words, a camera's metering mechanism measures the light in the scene and then decides what kind of aperture, shutter speed, and/or ISO value must be used, according to the exposure mode* selected, in order to get the exposure the camera thinks you want.
* Exposure mode = Programmed Auto, Aperture Priority, Shutter Priority, Manual
The emphasis here is on 'thinks'. A camera can't of course read your mind and know what you're trying to achieve, but it tries to guess. For this guessing, the camera relies on several factors. These factors are:
- Metering mode used
- Individual camera model design philosophy
Center weighted and spot are very simple.
If you select spot, the camera calculates the exposure that will be applied for the whole scene based on the information received from the point under the spot of the focus point selected. If you fill your frame with a white wall on which there is a tiny black paper and you spot-meter from that patch of black paper, the camera will give you an exposure that will return a grey value for the black paper (hence, revealing detail there), and - inevitably - obliterating detail on the rest of the frame, resulting on overexposure of the wall.
If you select center-weighted, the camera does the same as with the spot, only this time it receives information from a much larger circle in the middle of the frame (you can adjust the dimensions of the circle in some higher-end cameras, like the D610, D7100, and so on).
Matrix metering is where things begin to get interesting. Basically, Matrix metering involves far more guessing on behalf of the camera regarding your intentions. But it is educated guessing. Basically, in very simple terms, the camera reads several segments from the frame and tries to figure out what kind of scene you're shooting and what you're trying to do. Then, according to the individual camera model design philosophy, it gives you a certain exposure.
But what does that design philosophy mean?
Simple. It means that, for the same scene, camera A will give exposure 'a', while camera B will give exposure 'b'.
"Now, hang on!", you will say. "How can two functioning cameras, for the same scene, give you correct exposures? That surely means one of them is wrong".
Well, no! There is no such thing as "correct exposure", remember? What happens is that one camera thinks you're after exposure 'a', while the other camera (well, the Nikon engineers that designed it) thinks you're after exposure 'b'. You see, a Nikon D3300 is aimed at a certain audience: beginners, consumers, soccer dads, whatever you wanna call them. That surely doesn't mean it's not a fine tool that many advanced photographers can use, too. Simply, what the intended audience is. At the same time, a Nikon D810 is aimed at an entirely different audience: professionals, or, at the very least, very advanced amateurs that know what they're doing.
So, what does that have to do with metering? Consider the following photo:
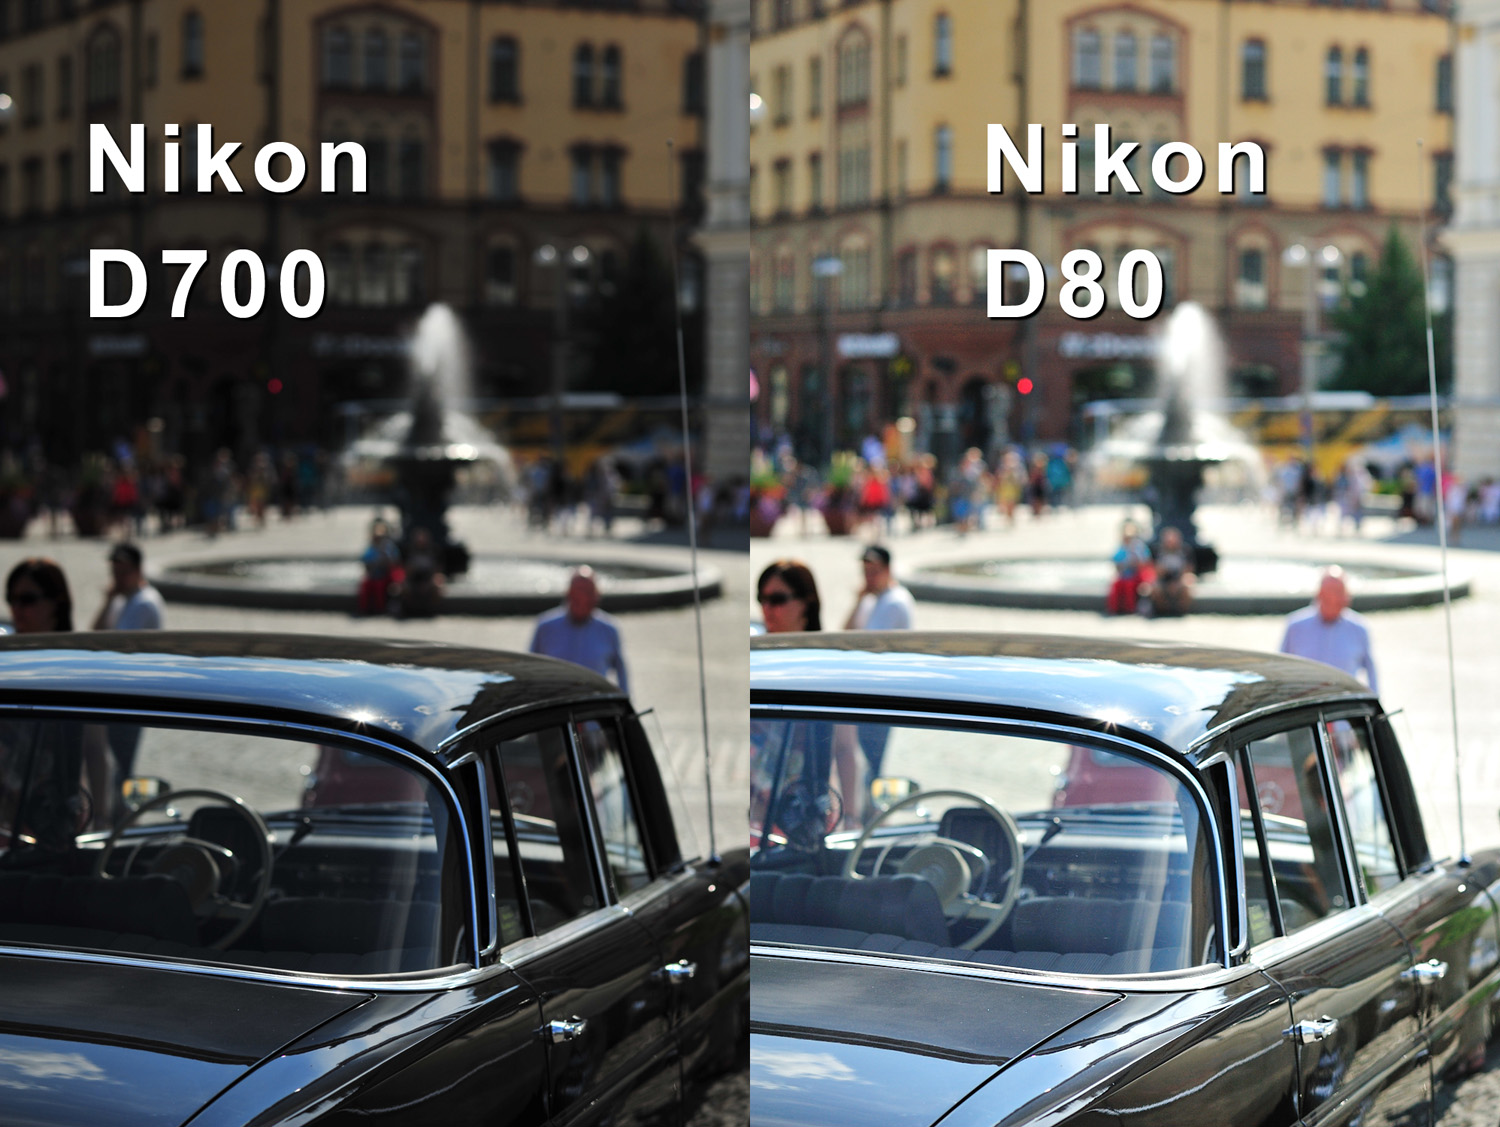 |
| This is only a simulation. But I've used both kinds of cameras so extensively that I can assure you, it's a very accurate representation of what could happen. |
So, to return to the original question, which metering mode should you use? Here are my 5 quick tips for mastering this important element of photography:
- Learn your camera. Obviously, having the information above plus your own observations, you should know how your camera behaves in certain scenes. With experience, you'll know how your camera will meter a scene - particularly with Matrix metering.
- Learn when to use Center-Weighted. As a continuation of the tip above, you should be able to recognize when center-weighted metering is a viable option. For instance, if you're taking photos of a subject covering more-or-less the center of the frame, but the light might change from shot to shot, Center-Weighted will give you more consistent results as a whole. Example: Dancing couple in rapidly changing dance-floor lights.
- Learn when to use Spot Metering. Similarly, spot metering might be a viable - if not the only - solution for some shots. These cases are more rare, but you should still be aware of those. Example: White flower in sunlight, covering a very small part of the frame, with the background being dark, leafy forest trees in shadow.
- Learn to lock exposure. There are two ways for this. The one is the traditional - use the AE Lock button. If you meter the light off a subject that stays in similar lighting conditions, while other light in the frame changes, you can use AE lock to assure a correct exposure. Example: soccer/football photos - light on the field is consistent (for short periods of time anyway), but a frame including more or less of, say, the sky, might fool the meter.
- Learn to use Manual Exposure Mode. I said there are two ways to lock exposure. This is the other one. I'm not one of those self-important people who will tell you something as idiotic as "always use manual". There are cases that Shutter Priority or Aperture Priority are fine. But there are also cases where Manual can be the most reliable. In the soccer/football scenario mentioned above, disable Auto ISO and put your camera on Manual mode. Adjust speed and aperture to your liking, noticing the exposure bar information. Take a shot. If everything looks fine (you can also consult the histogram for blocked shadows or blown highlights - but read this, too!), you know that this given exposure (say, 1/250 @ f/5.6 is the one you want). As long as the lighting conditions don't change or you don't need a different kind of exposure, there's no need to get out of that and risk missing the shot-of-a-lifetime (just sayin') because the camera thought you wanted to expose for that passing white cloud.

No comments:
Post a Comment