A very special treat for today: A guest post! Written by my good friend Mads, photographer and chef extraordinaire. This guy has crazy skills in both photography and cooking, and his blog (link at the end of this article) is well worth a visit!
-- Chris, for AmateurNikon
-- Chris, for AmateurNikon

When I cook and photograph for my blog one of the last things I can be bothered with is setting up advanced lighting. I'm all in with my cooking, so it takes up most of my concentration. But of course I can't present bad, under exposed or grainy photos on a food blog. So I needed to be smart. Here are some tips, based on what I learned, the hard way:
Well, first of all, I do own a speedlight. I am learning to use it but not fast enough for me to want to bring that factor into my food photography. And besides, it would just be another technological terror to take up that precious counter top space. Needless to say, I don't have a tripod in my way, either.
Check your area for good light sources. If it's your kitchen, you should know, right? Well, many kitchens have a rather dull and annoying fluorescent light in the ceiling. But how about the stove, might there be incandescent or halogen bulbs (or even LED)? It might be a small light but harsh shadows we can live with.
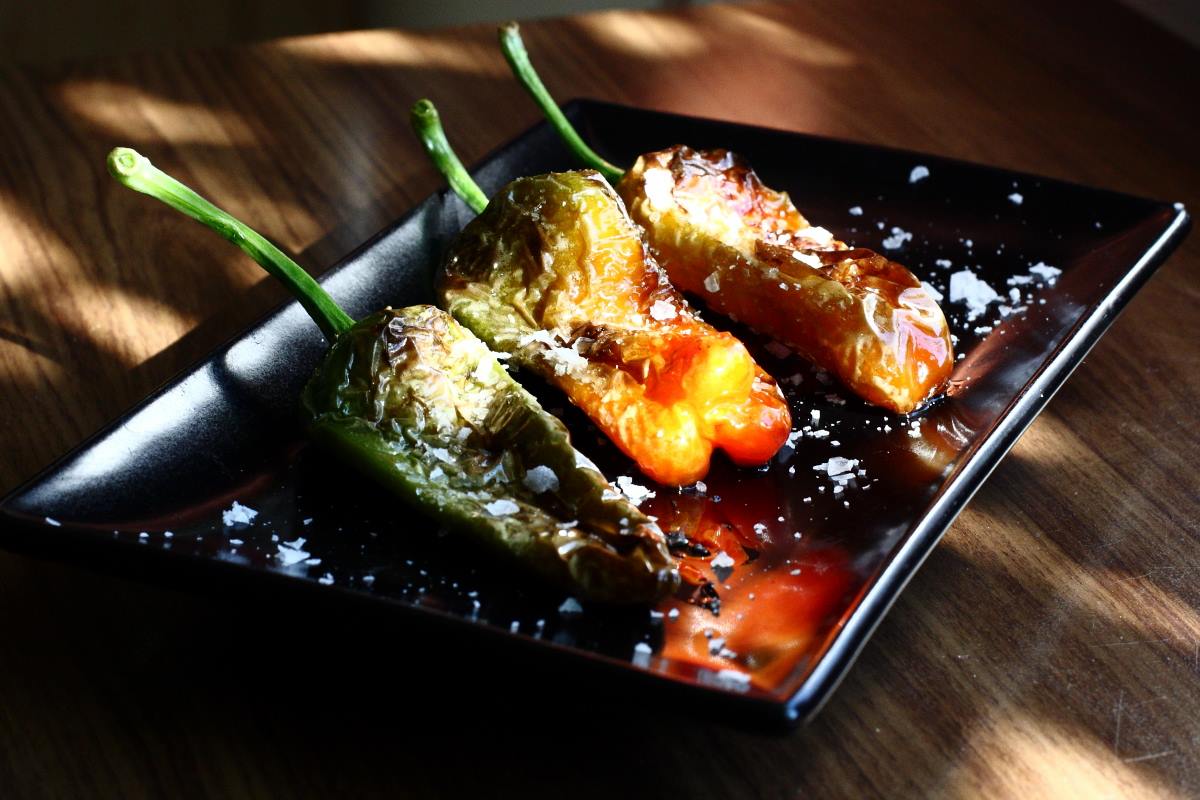
Use your window! Most kitchens have windows, so use some of that lovely light spilling in from there. You may have to shoot against the light, or across it, but the subject gets lit al right. If it's a sunny day, you'll have harsh light (and/or even shadows), but sometimes you'll have to get the best of it, such as in this example:
A gear related tip would be to lose the kit lens and buy a prime! Both Canon and Nikon have 50mm1.8's at pretty affordable prices. If you shoot portraits, I'm sure you already own one. In any event, you should have one. Even an old manual lens will do. Most food won't move and you'll have plenty of time to focus. And with a good prime, you will learn to zoom by using your legs.
Using a large aperture will of course cost you some valuable depth of field, which is a sacrifice you will learn to a) live with and b) deal with.
a) First of all, most food is pretty similar looking, all across the plate, take a large steak or a pasta dish as an example. You will only need part of it in perfect focus. The viewer will know that the rest looks similar and equally delish.
b) Secondly, you can raise your camera angle to get a larger part in focus. In extreme cases, a direct overhead shot will do the trick just fine.
Finally, Bokeh is your friend! That Japanese pleasant OOF blur can easily become part of your picture and the meal that you are trying to sell. Find something the same color as your subject or even a contrasting color will do. I did that with some potato patties I made the other day:

To sum up: Know your workspace and watch out for interesting light! Don't fear shooting into the light. Use a fast prime. Use out of focus areas to your advantage. After all, you are the boss of your yummy foods!
Since this is my first post here, I'll keep a close eye on your comments, let me know if it's too banal or too advanced. You're welcome to stop by kitchenfears.blogspot.com to check out more of my stuff. As for photography, since I'm filling in for AmateurNikon, I guess you can call me AmateurCanon ;-)

Thanks for the tips! Cooking and photography are two of my passions, but I've never tried to combine them. I'll give it a go and keep these thoughts in mind.
ReplyDelete