A really simple but powerful procedure for today, that will give a really nice boost for some of your images. It's best suited for landscapes, particularly those with high detail (rather than large even surfaces, like skies). A midtone unsharp mask, as the name implies, is a use of the unsharp mask aimed at increasing the midtone contrast. This gives a "punch" to your images, making them more vivid. Notice the following image (click to enlarge, the difference should be
subtle)
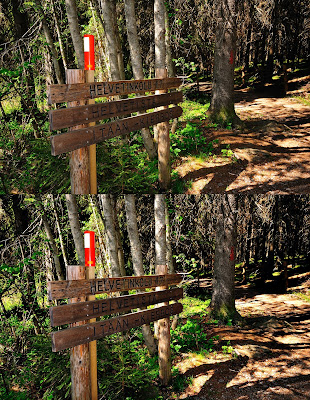 |
| Click to Enlarge |
To recreate this, simply open your image, and select the following values on the unsharp mask dialog: Amount 20%, Radius 50, Threshold 0
That's it! On very special cases, you can run the same procedure (with the same values) one more time, but it's better not to overdo it. Less is more. And like I mentioned in the prologue, this works best with fine-detail landscapes. Definitely avoid for portraits, unless if you're after a particular, harsh effect like with this one:


No comments:
Post a Comment